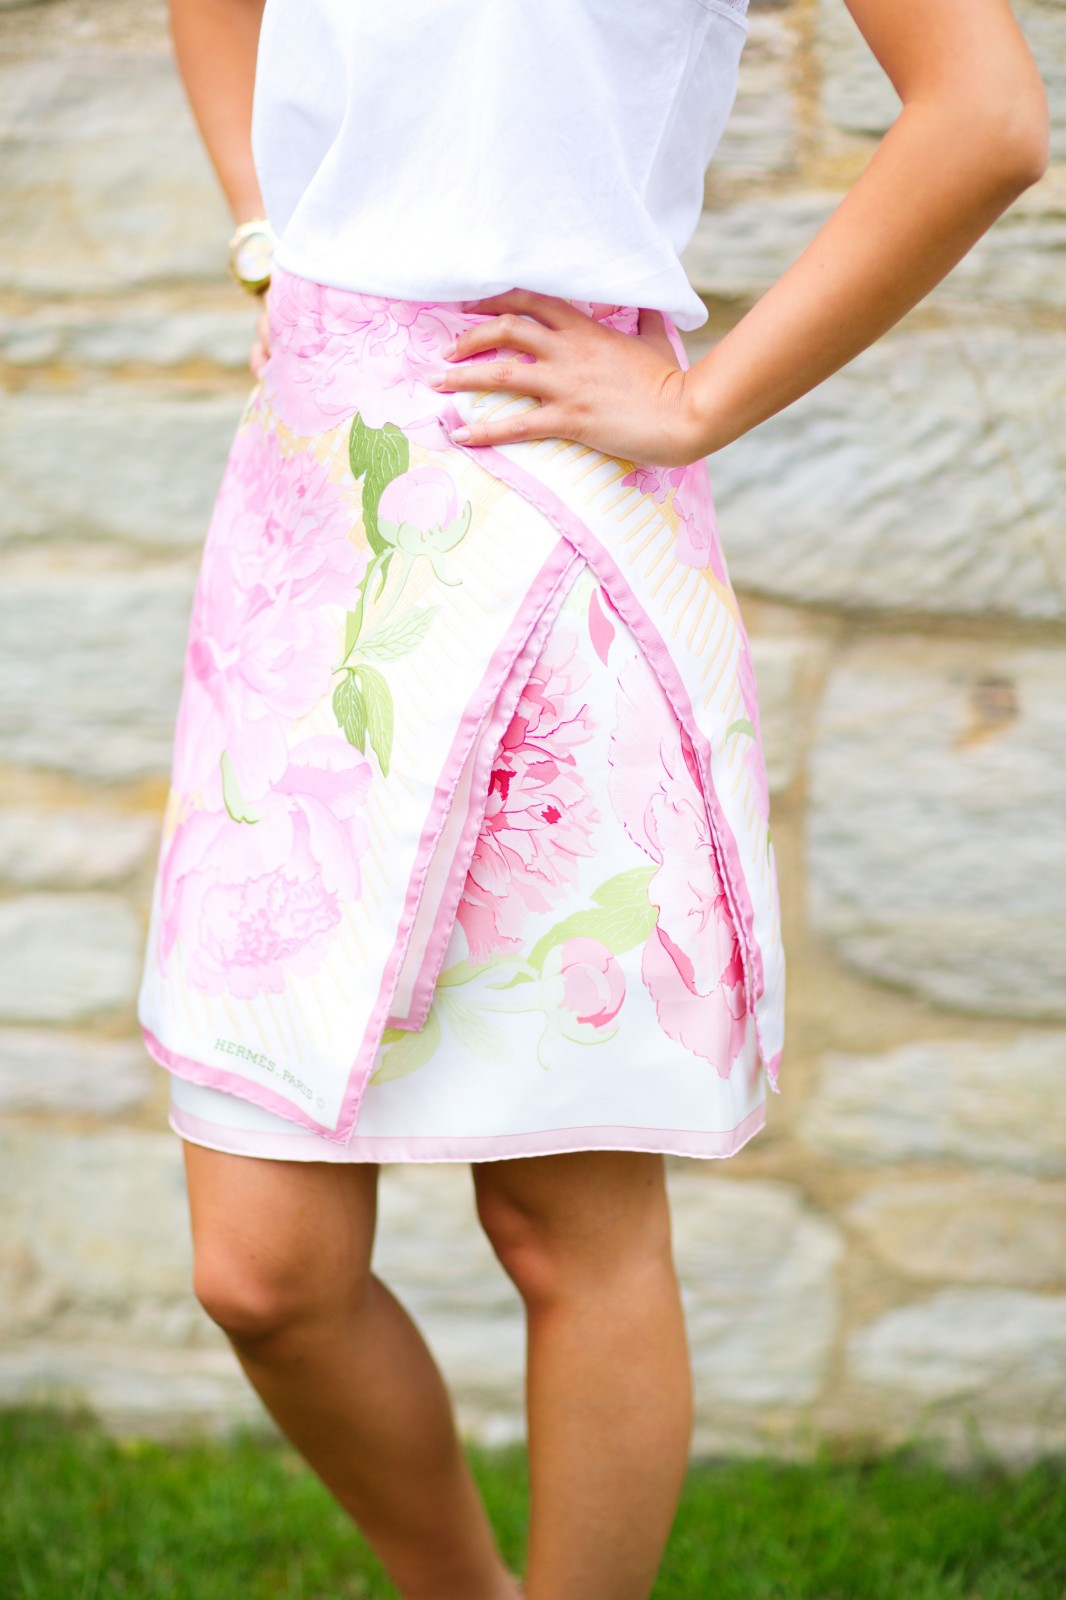
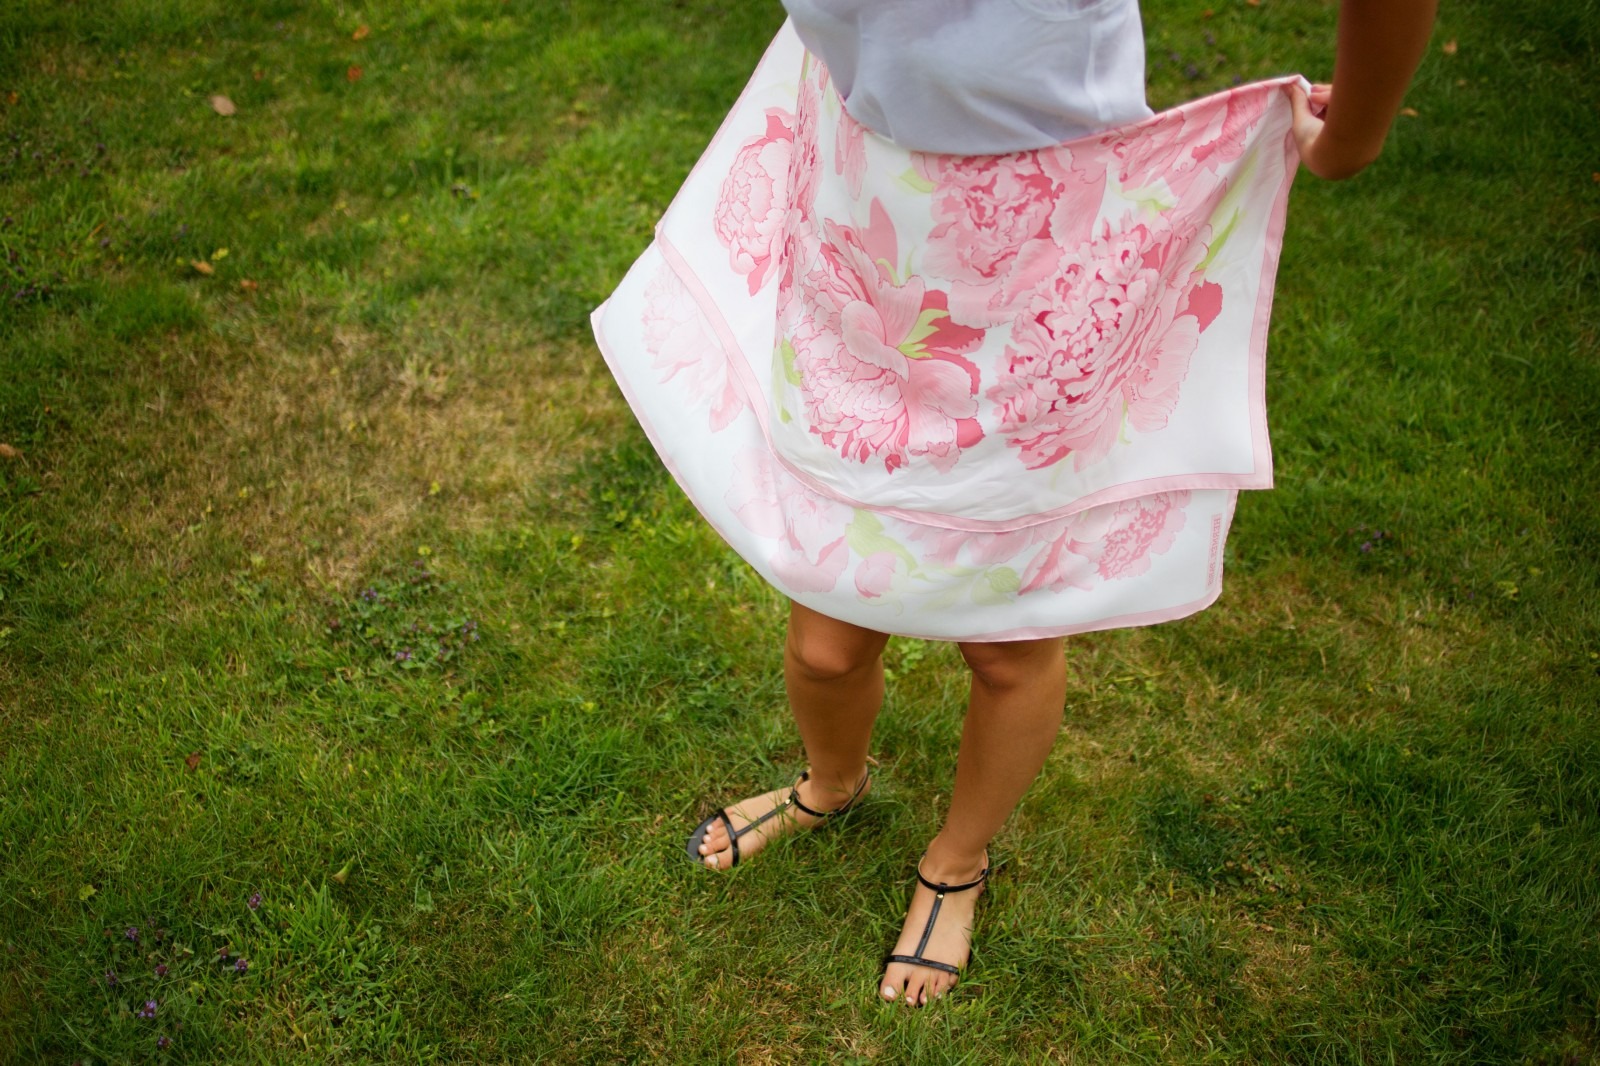
Two Scarves Make a Skirt


ArticlesFashion Tutorials

Following on the theme of how to use scarves to make dresses here is my favourite way to make a skirt from silk scarves.

It’s super simple and all you need is two scarves and tree safety pins, it’s a great holiday option for that reason, light packing! It can also be really fun to have contrasting prints on the scarves.

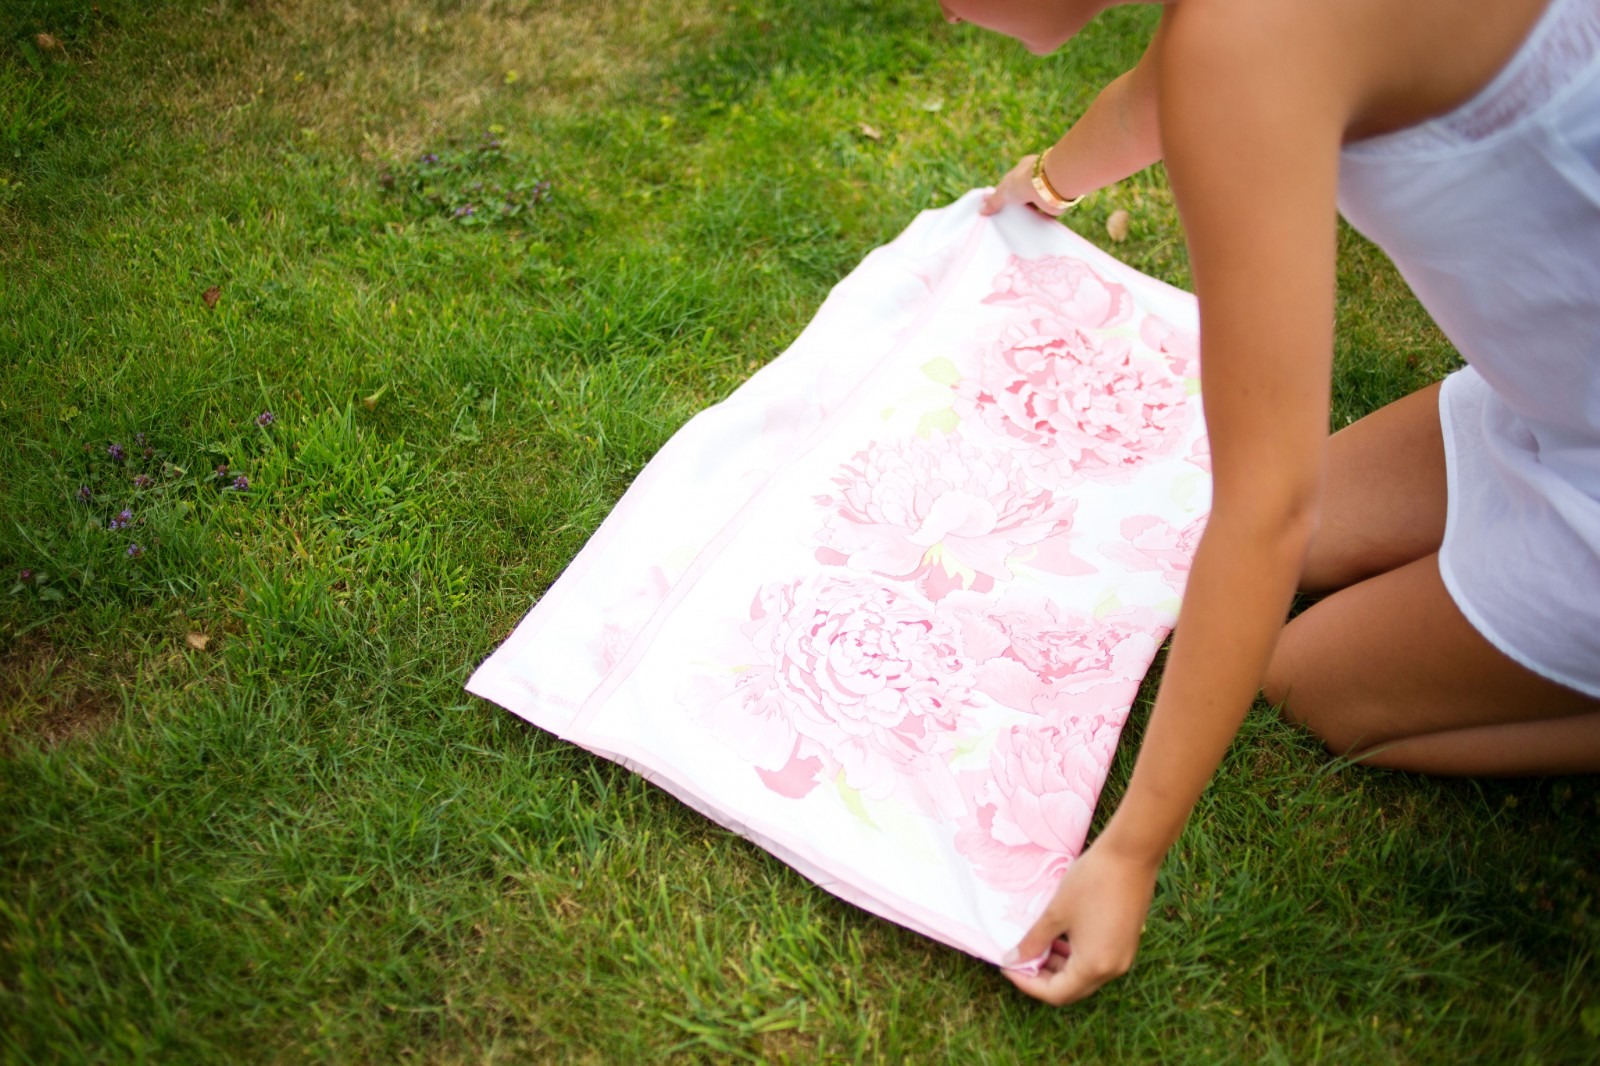
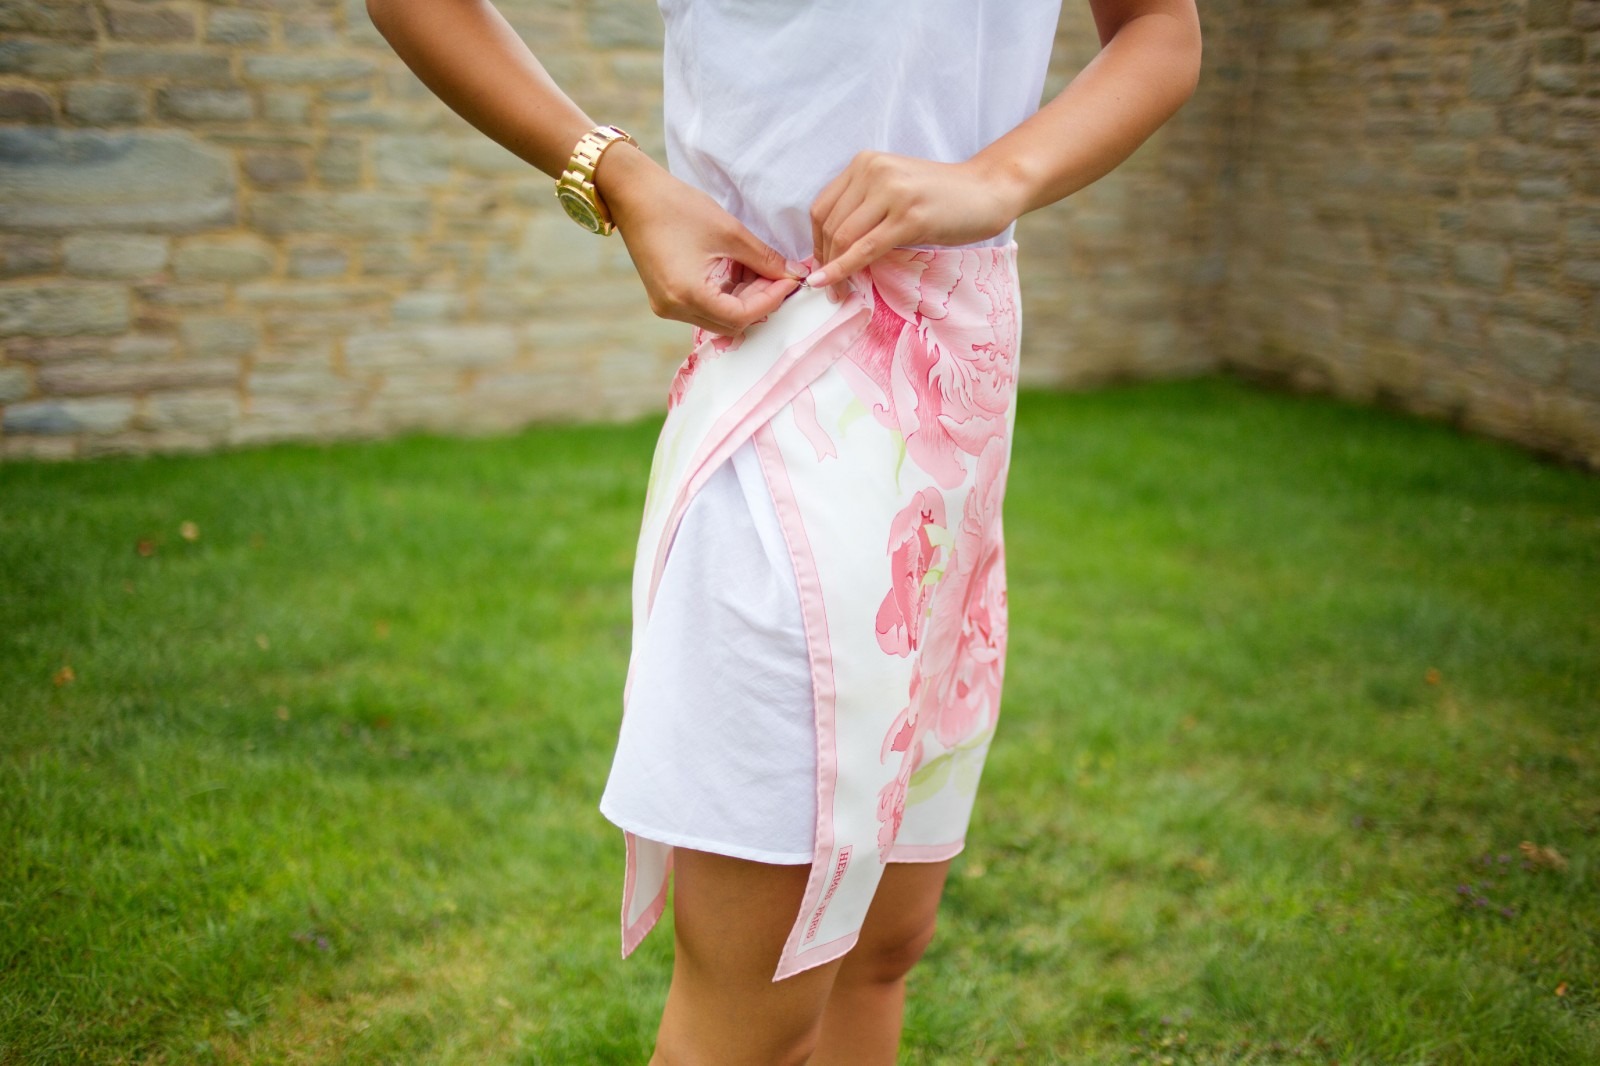
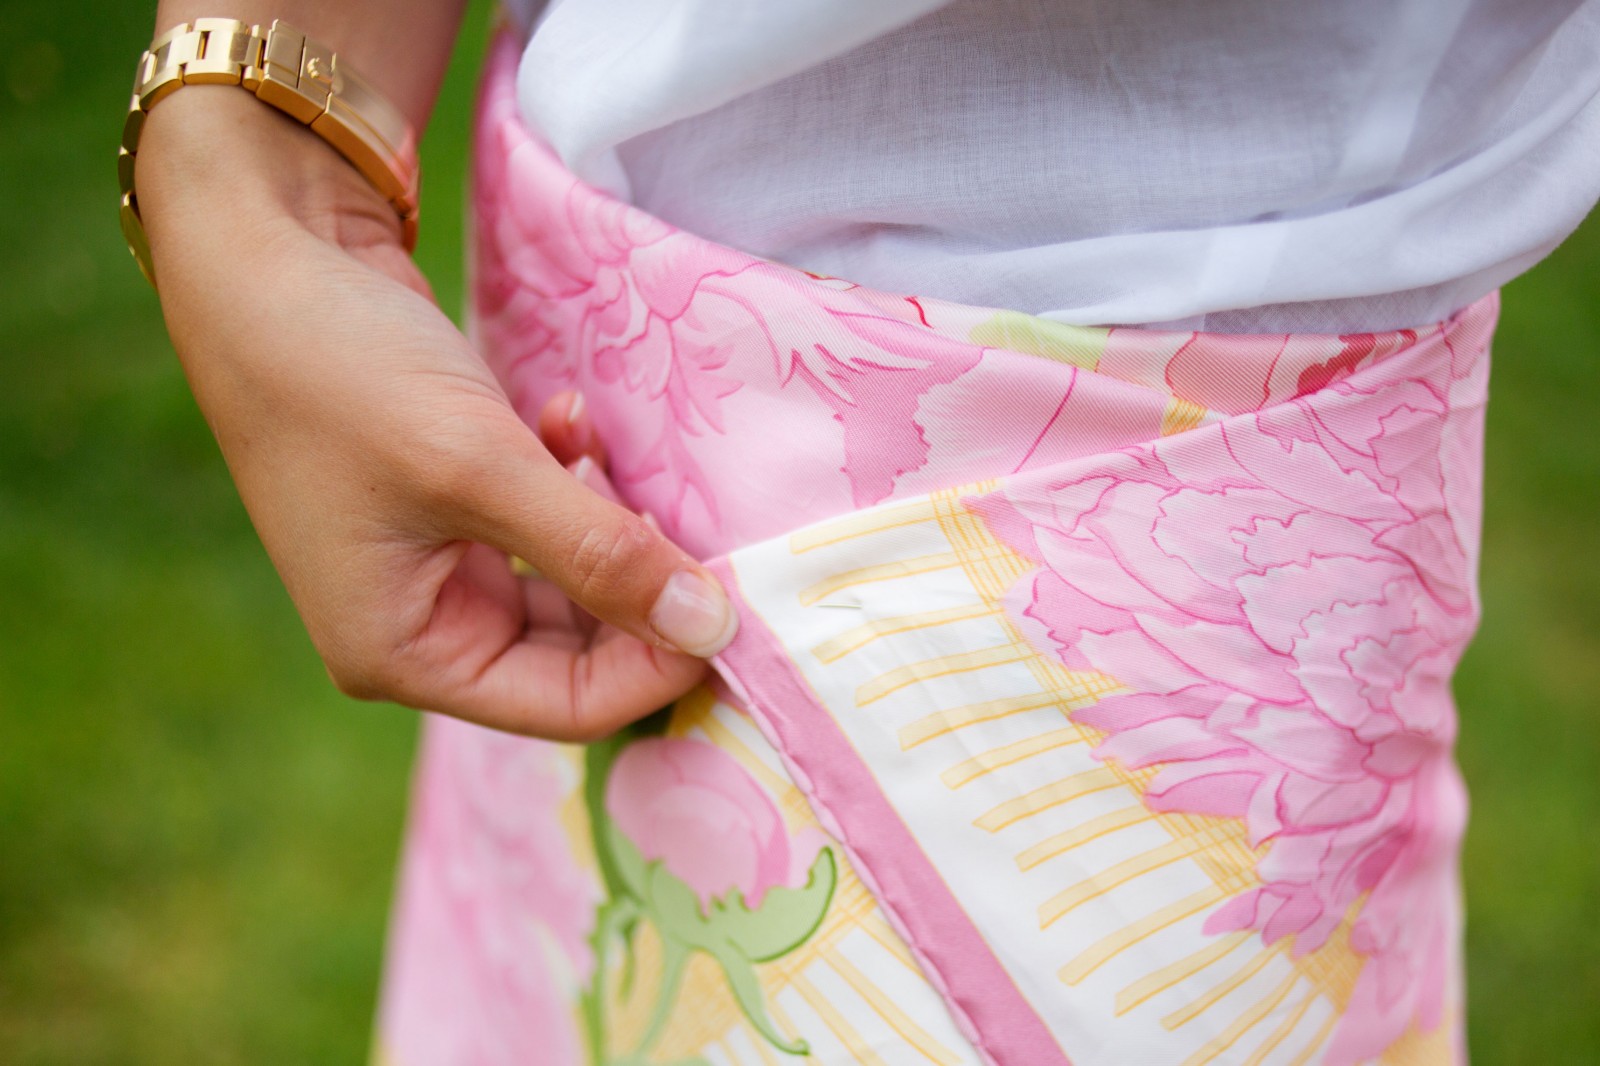
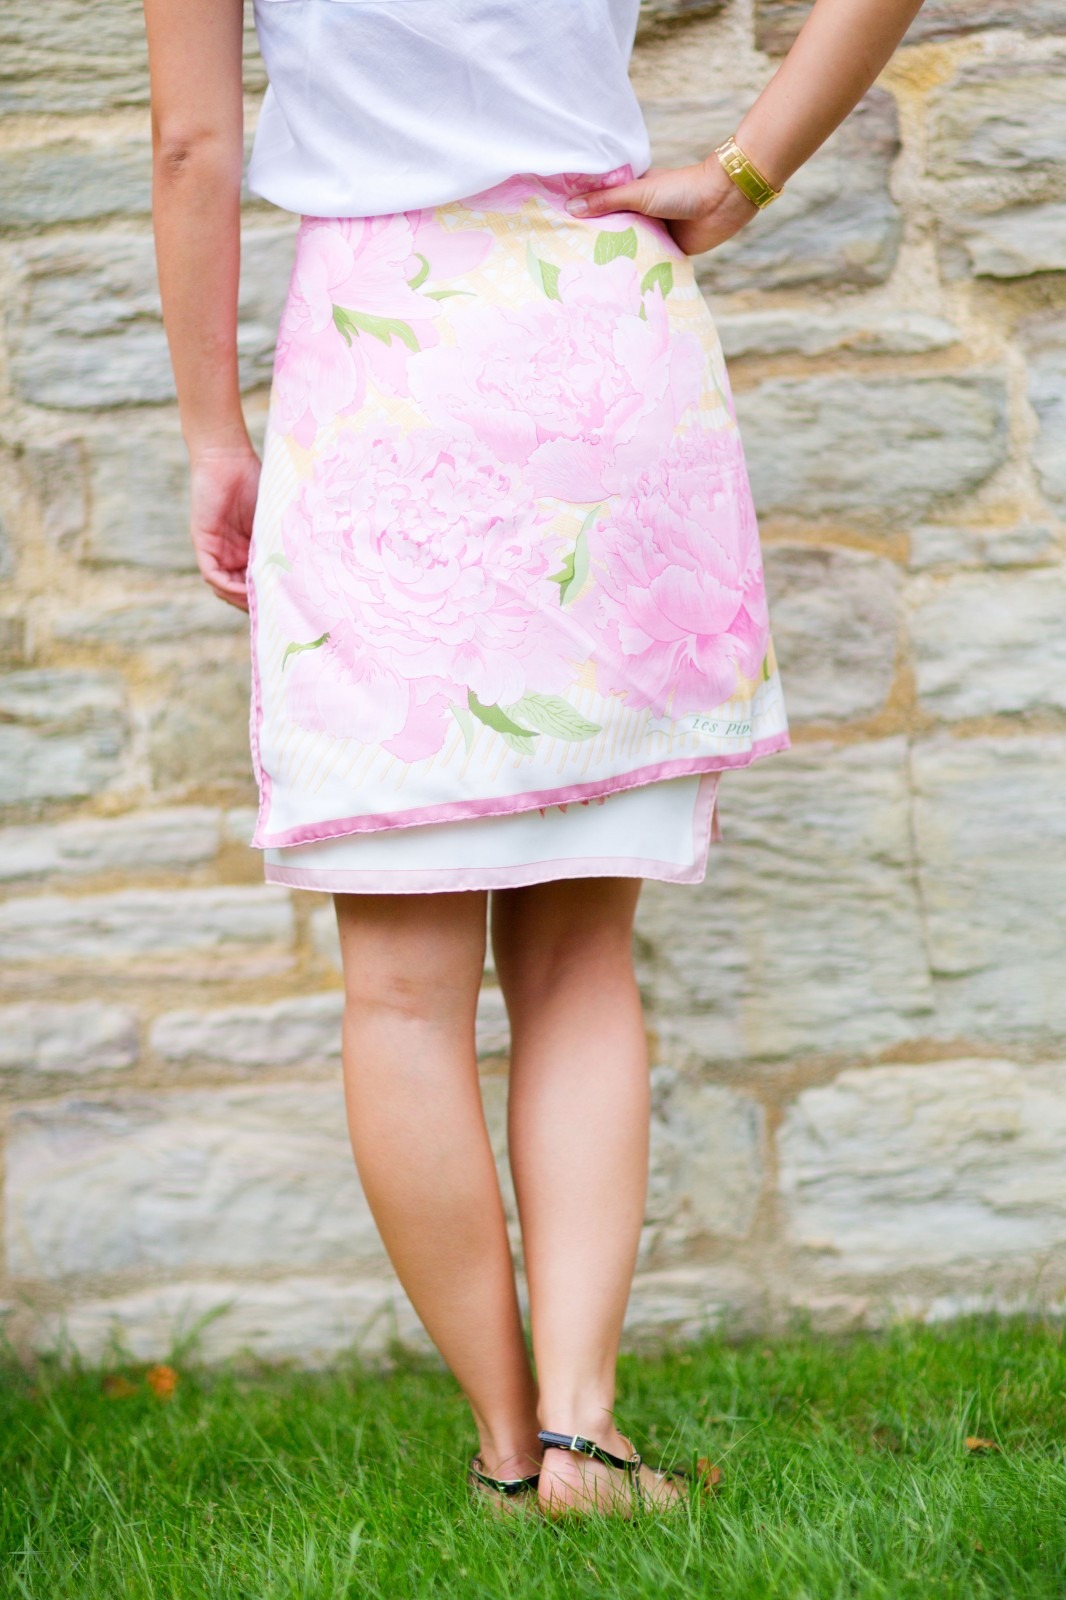
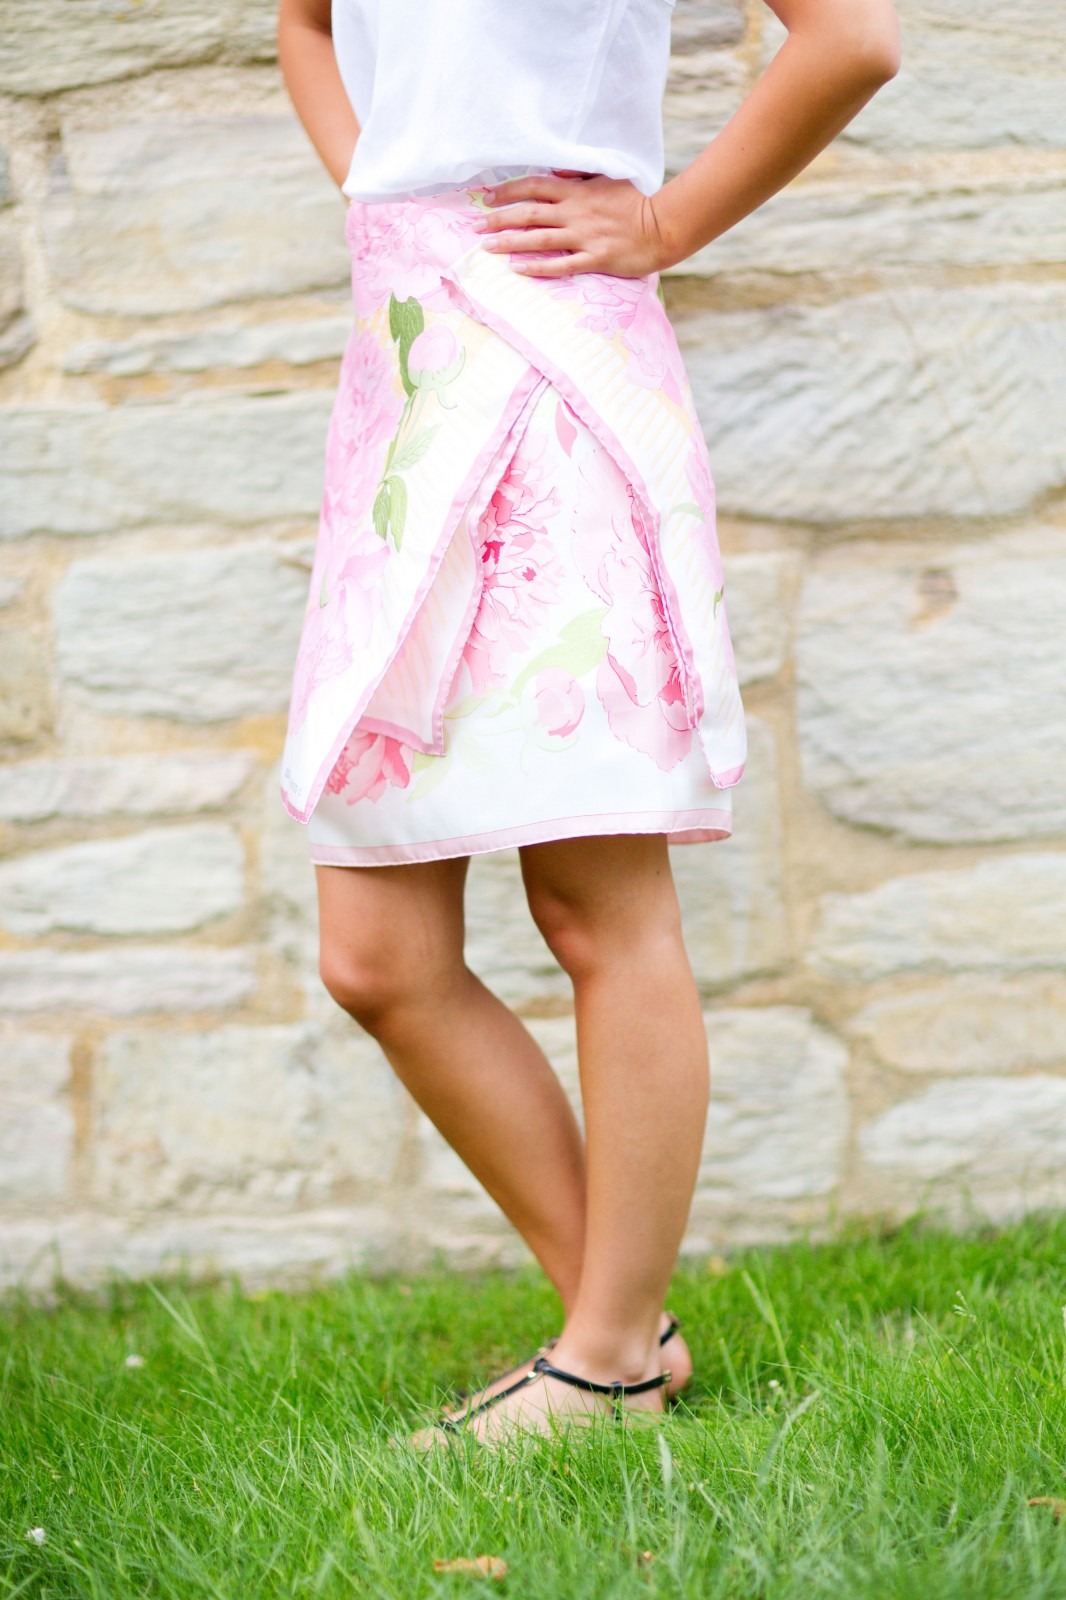
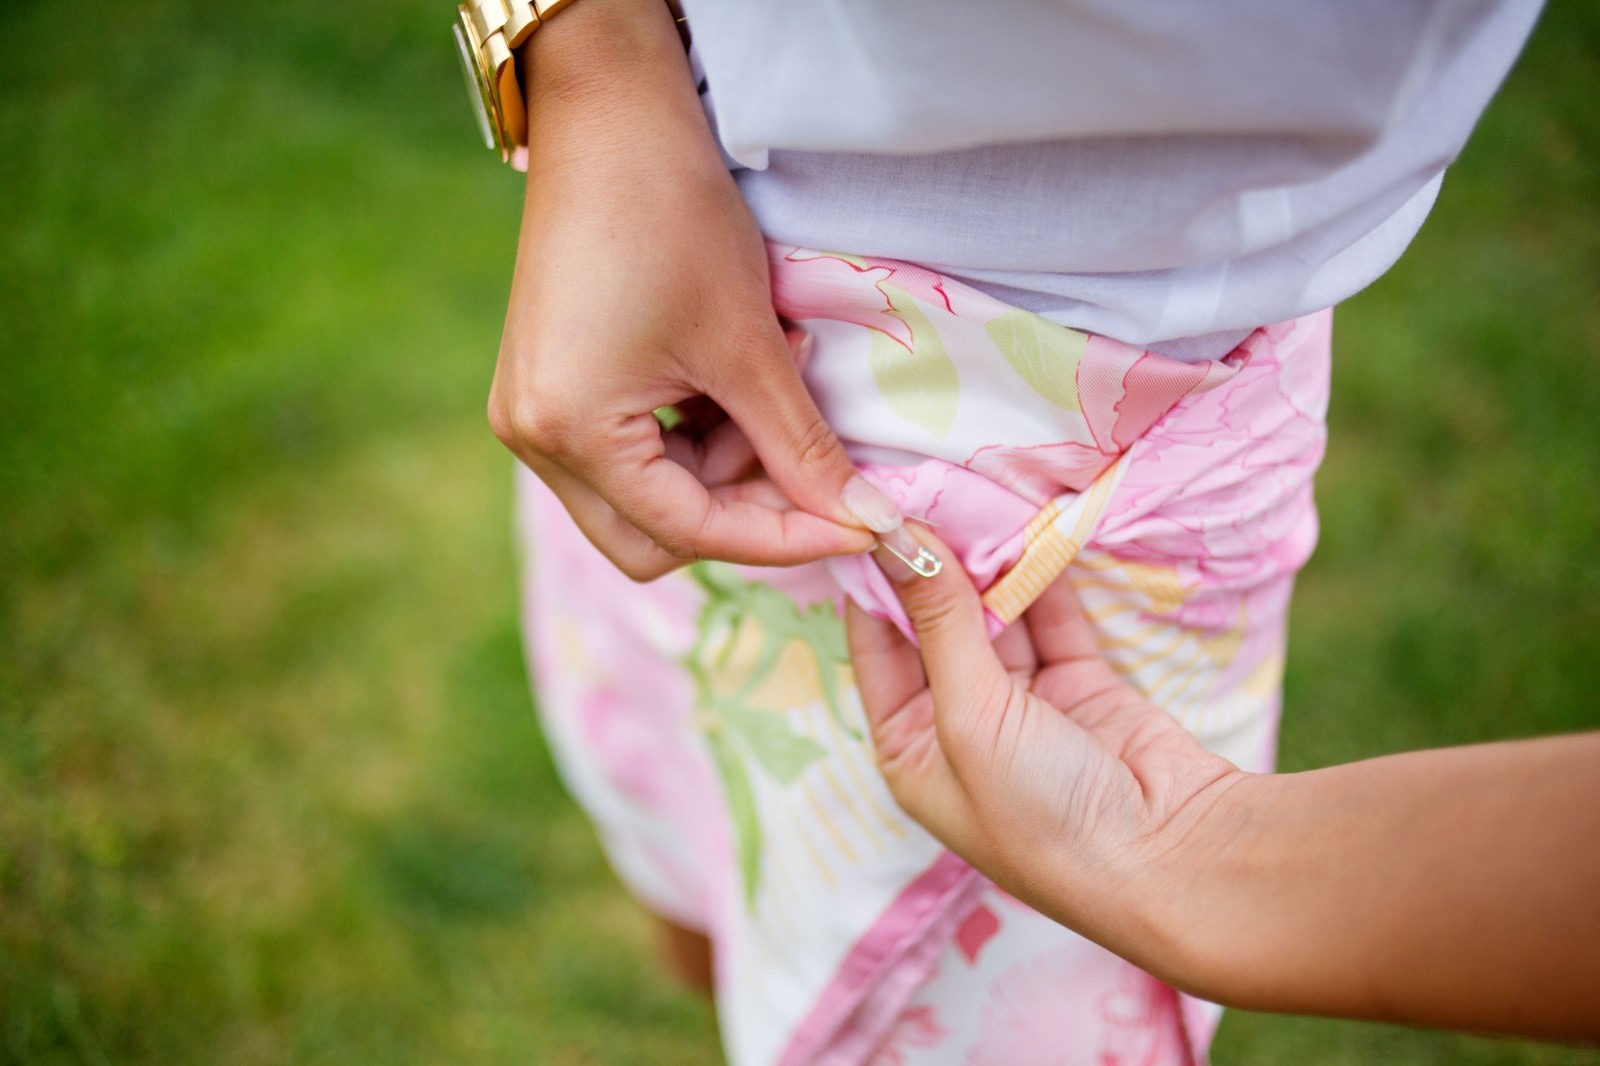
  1. Depending on the length of skirt you want, fold the scarf in half to the desired length and hold it around your waist.
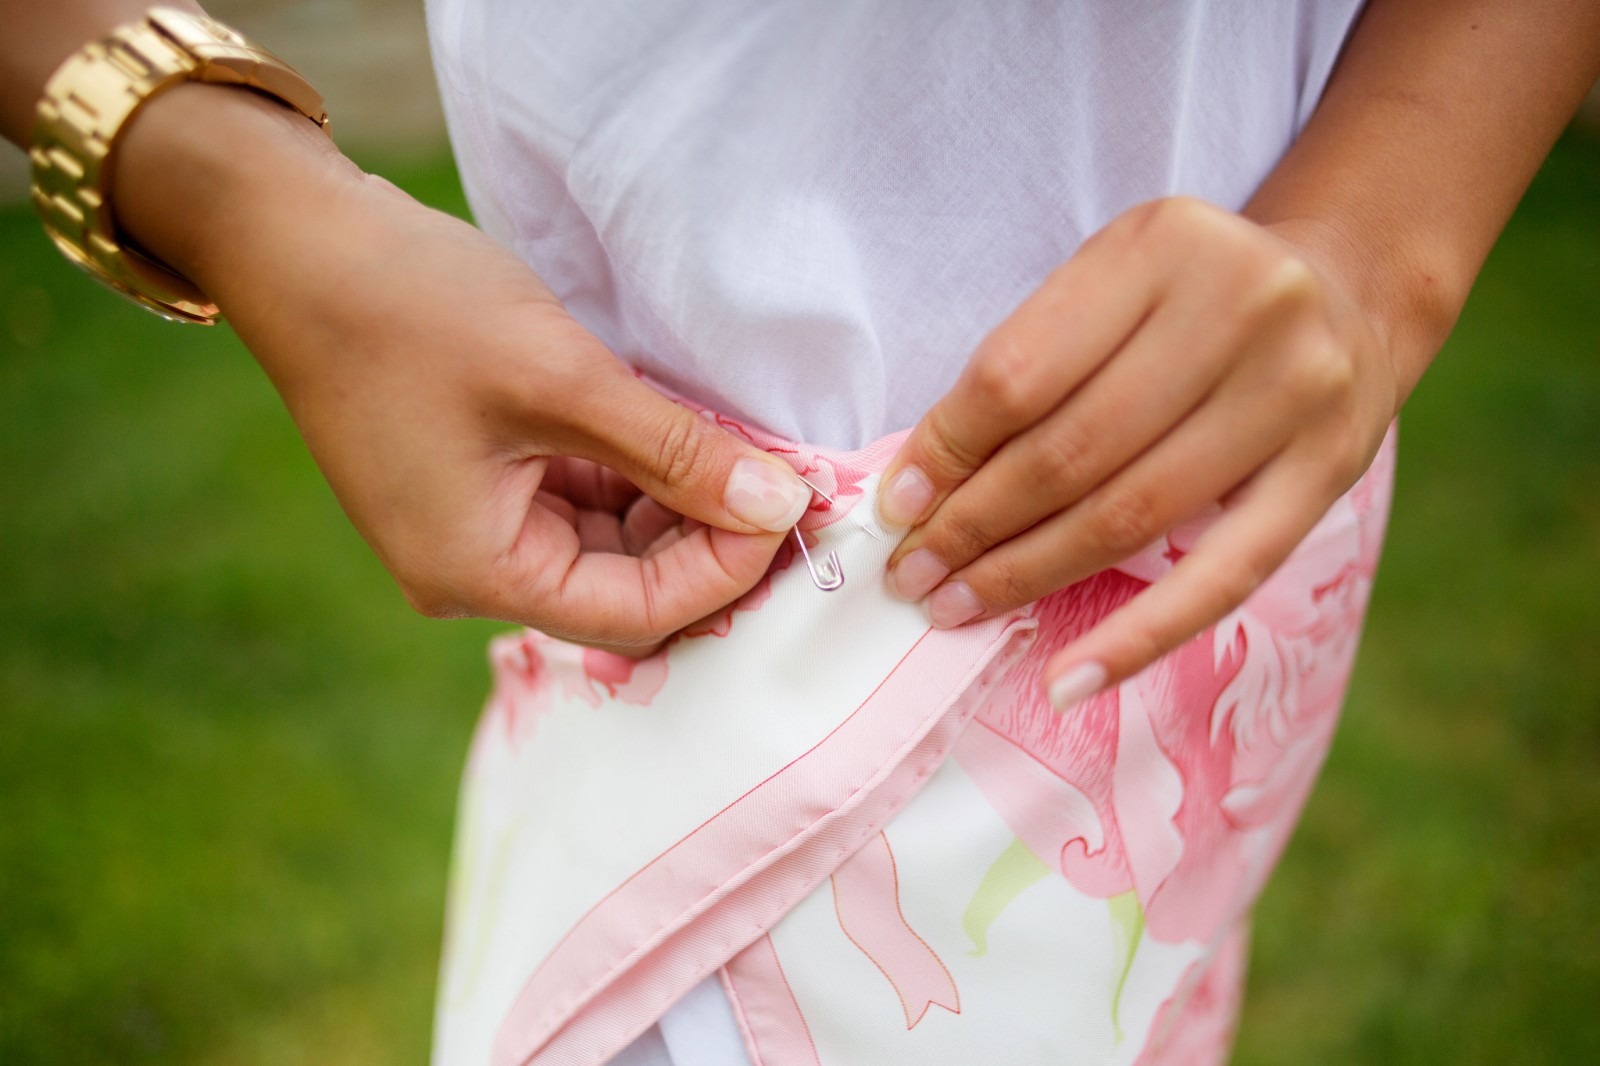
  2. Fasten it on the inside with the safely pin, making sure the scarf overlaps as much as possible.
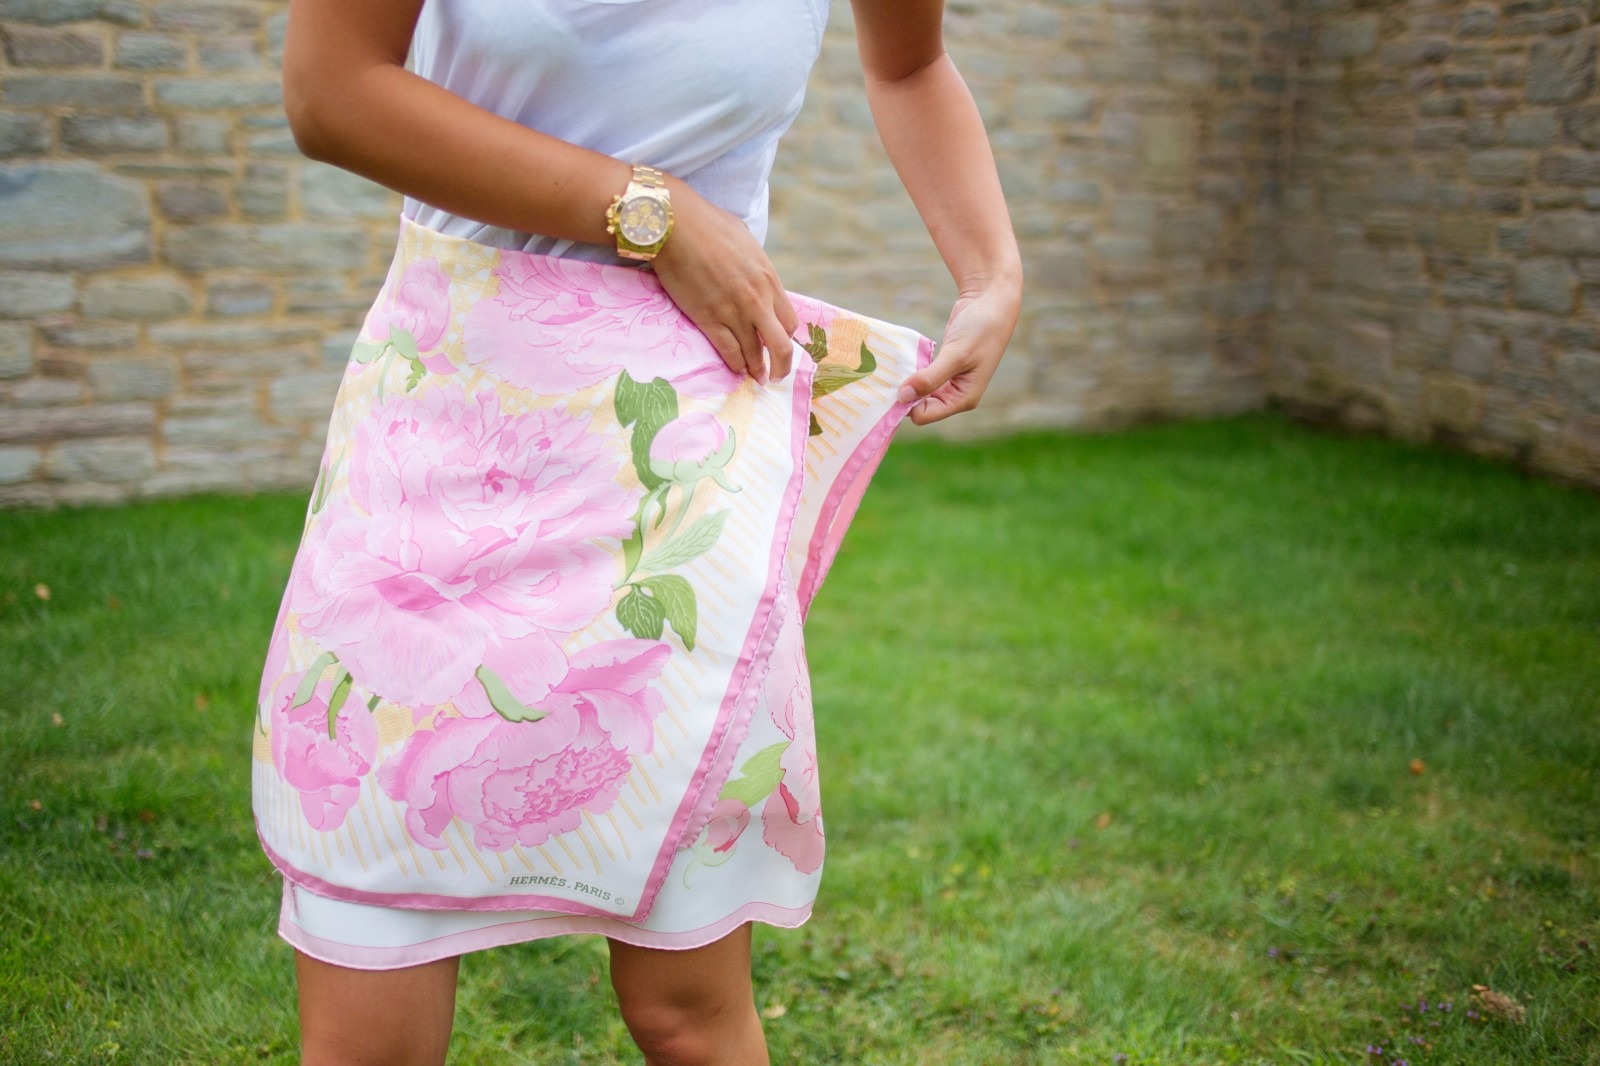
  3. Do the same with the second scarf but in the opposite direction to cover the existing gap and fasten in the same way.
  4. Then take the third safely pin and at the back above your bun attach the two scarves to each other (this is stop them from spinning around as you walk and revealing your knickers!).  And your done!

Here are some more great scarf options for you to make this look with!

Hermes, Alexander McQueen, Swash, Gucci, Emma Cook, Oasis, Whistles and Safety Pins.

Shake Shack


Eat
Often cult food is over hyped. You queue for what feels like enough time to make your stomach eat itself and then by the time the innovation arrives on a plate your too tired to even enjoy it. That or you conclude you couldn't possibly enjoy anything enough to last through a queue like that again.

Shack Shake

Shake Shack had that kind of hype, but lived up to it.  No longer the new kid to the fast food block, Shake Shack has now got branches all over the States, the Middle East, Turkey and now London!  The queues at the Covent Garden, London branch make you think they’re giving away gold, but actually this little tray is being dispensed.

The burgers pride themselves on being super soft, melt in the mouth with the most delicious sweet bun.   I always go with cheesie fries and an ice tea to top it off.  It really is one of my favourite fashion week fillers (if you follow me on Instagram you will know its true).

For me it will always be a NYC meal, but I’m so happy to be able to stave of the cravings with one in London now!

Making the Sun Shine


Body & BathSkincare

Fake tan is probably the most controversial beauty product I use.  It can go so wrong. I mean just horrifically so. Everyone has seen the aftermath of a friend’s unfortunate  collision with said products, palms stained, streaks palpably visible. I think the best way to avoid such a debacle is to use a product you trust. Which means finding one that suits your skin tone.  Anything that comes in an orange bottle should be avoided unless umpa lumpa chic is your thing.

I recommend two brands, the classic Saint Tropez (which is great on a multitude of skin tones but works very well on paler skin tones as it has a brown not orange base), and Clarins (which gives a richer colour for mid to darker skin tones and is warmer).

There are also a couple of rules I always abide by to ensure a flawless natural looking tan.

  1. Never ever put fake tan onto unwashed, un-exfoliated or un-moisturised skin. Have a shower and give yourself a good scrub, then follow it with a simple moisturiser (unscented in essential so that it doesn’t react with the tan chemicals), I use E45. Make sure you do your palms thoroughly, as it will create a protective layer between them and the shameful orange palm situation.
  2. Apply one product throughout .  Never mix them. It can lead to a chemical combination disaster that will look like a toxic spill all over your thighs!
  3. Apply the fake tan liberally, then give it a few minutes to absorb. Now the  most  important of all the stages ;  BUFF YOUR SKIN !  I use a big cotton wool pad for this. When I say ‘buff’ I mean take the pad and lightly rub it over your skin. This will take off the extra product , ensuring an even all-over colour and avoiding those dreaded streaks.
  4. WASH YOUR HANDS! Go and get some proper soap and wash them at least three times after your your application is over.
  5. I do all of this before bed and then put on loose dark pjs to sleep in. I shower the next morning to remove the product and reveal my new tan!
  6. Moisturise everyday after fake tanning, it helps to make the tan fade naturally and not in speckles.
  7. Finally if your a first timer or bad luck tanner, make sure you use a product that shows the colour as you put it on. I love Clarins for its fool proof nature and great smell. You can’t go wrong if you can see the colour going on.  I promise .

I personally love Clarins for fake tan. They have a great variety of products for different depths of tan and tanning experience.

The products

Delicious Self Tanning Cream (my fav and the one in the large pot), Instant Smooth Self Tanning (the little pot, which has a great texture) and Liquid Bronze Self Tanning (for faces and delicate areas, this product is a white cream so not great for beginners).

Shoes Kurt Geiger and Sunglasses Ottica Mantovani.