Making a Dress from a Scarf. Part One
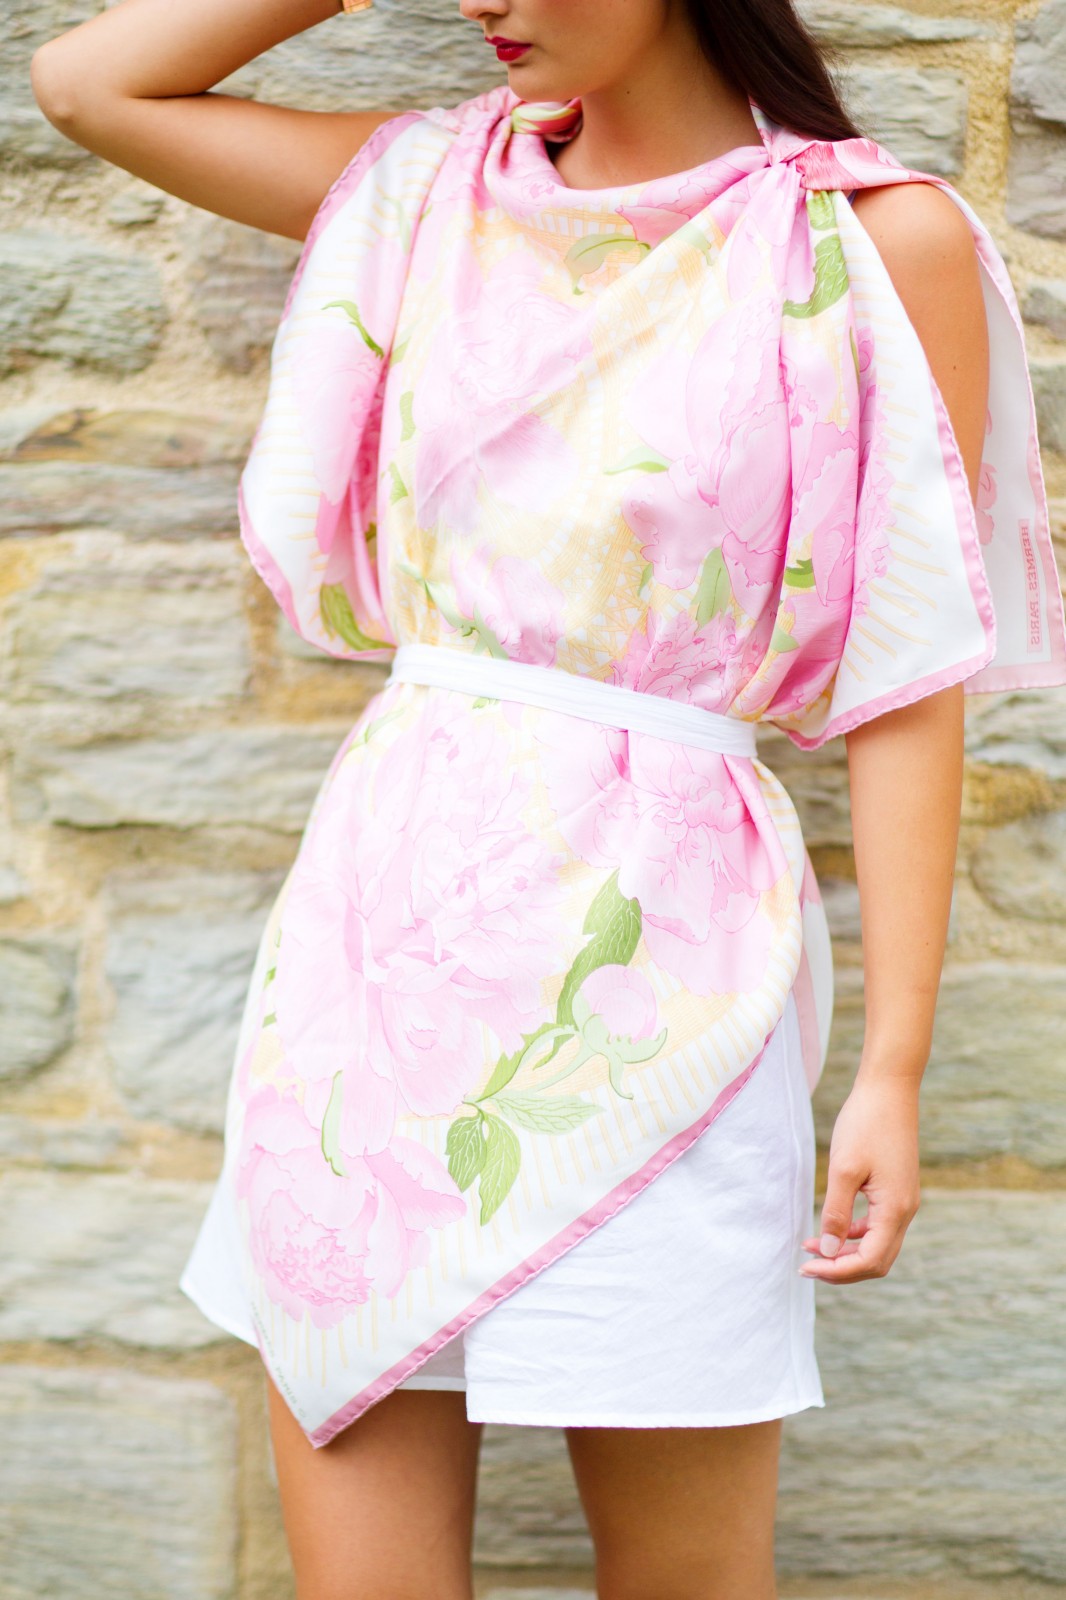
I know this is long over due but at last here is the scarf dress tutorial you have been asking for. You may remember that I wore this blue and white look for NYFW last September. Afterwards I got so many requests to show how to make the dress I knew I had to do a tutorial. So here it is! I’ve used smaller scarves (hence the top like length) just to make the tutorial a bit clearer.
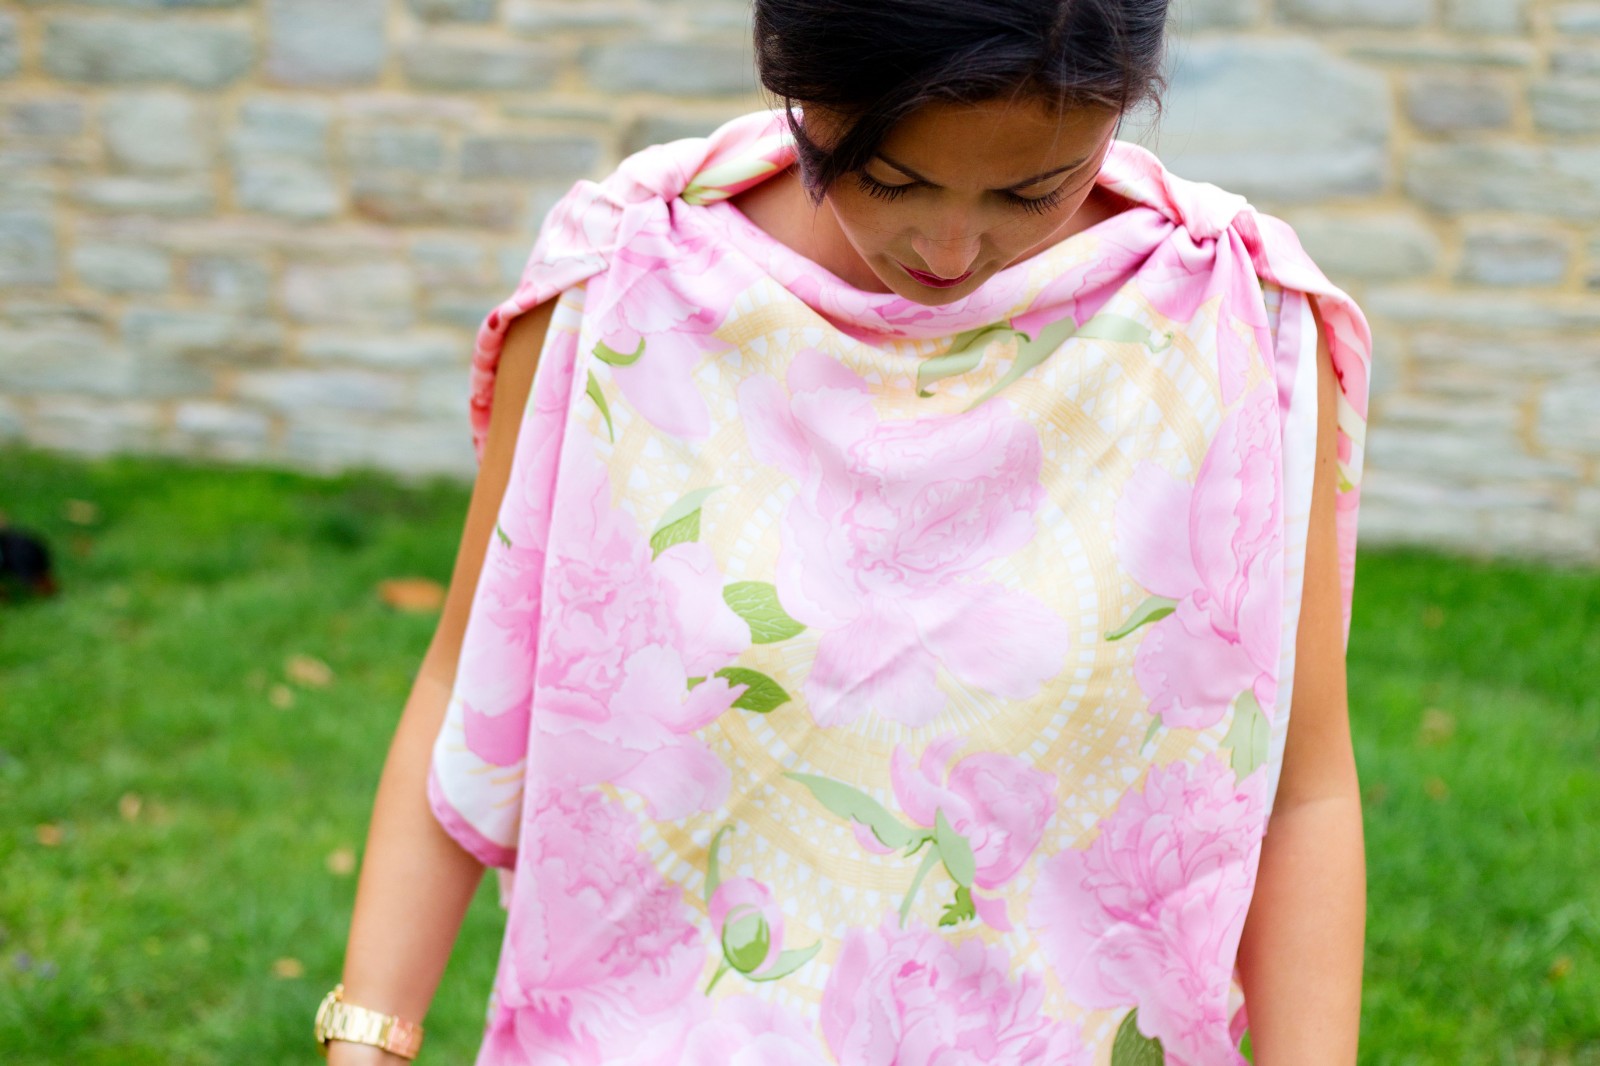
I have worn a slip under the scarves here , it can be really pretty to use a lace one under the dress or as I did in NYC just the scarves looks great too! Please let me know if any of this isn’t clear and I will explain further! Happy DIYing!
What you'll need
Two scarves of the same size
One length of ribbon
A couple of safety pins
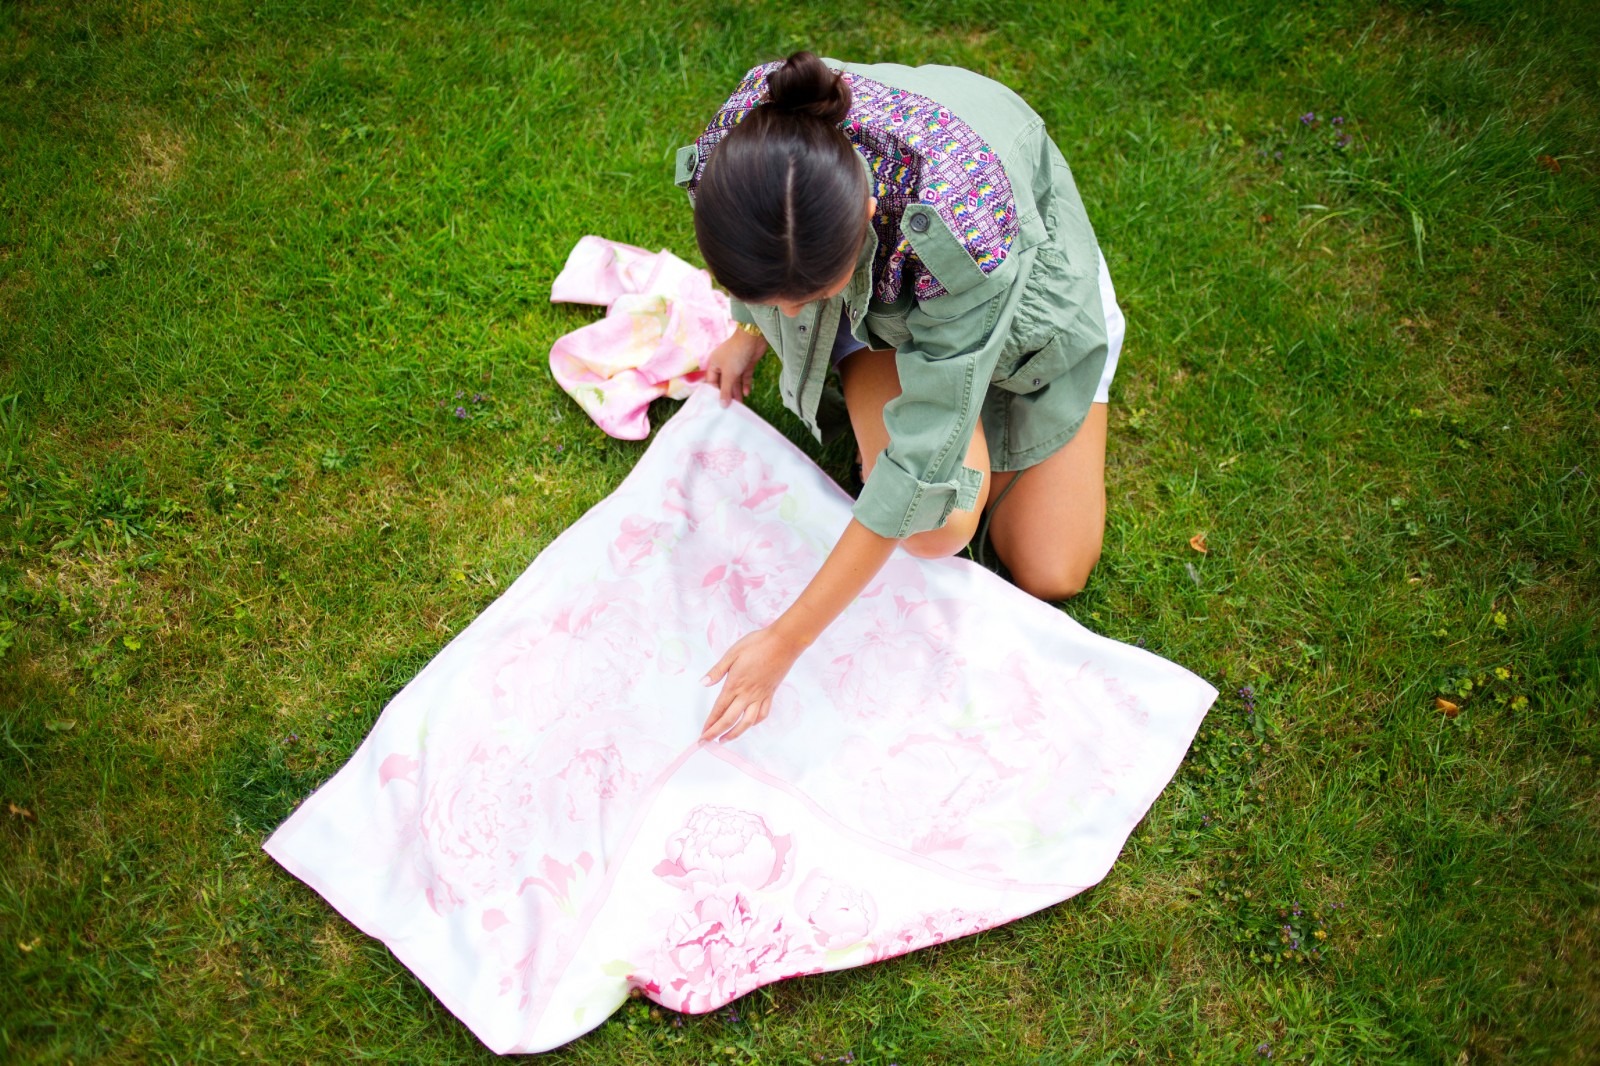
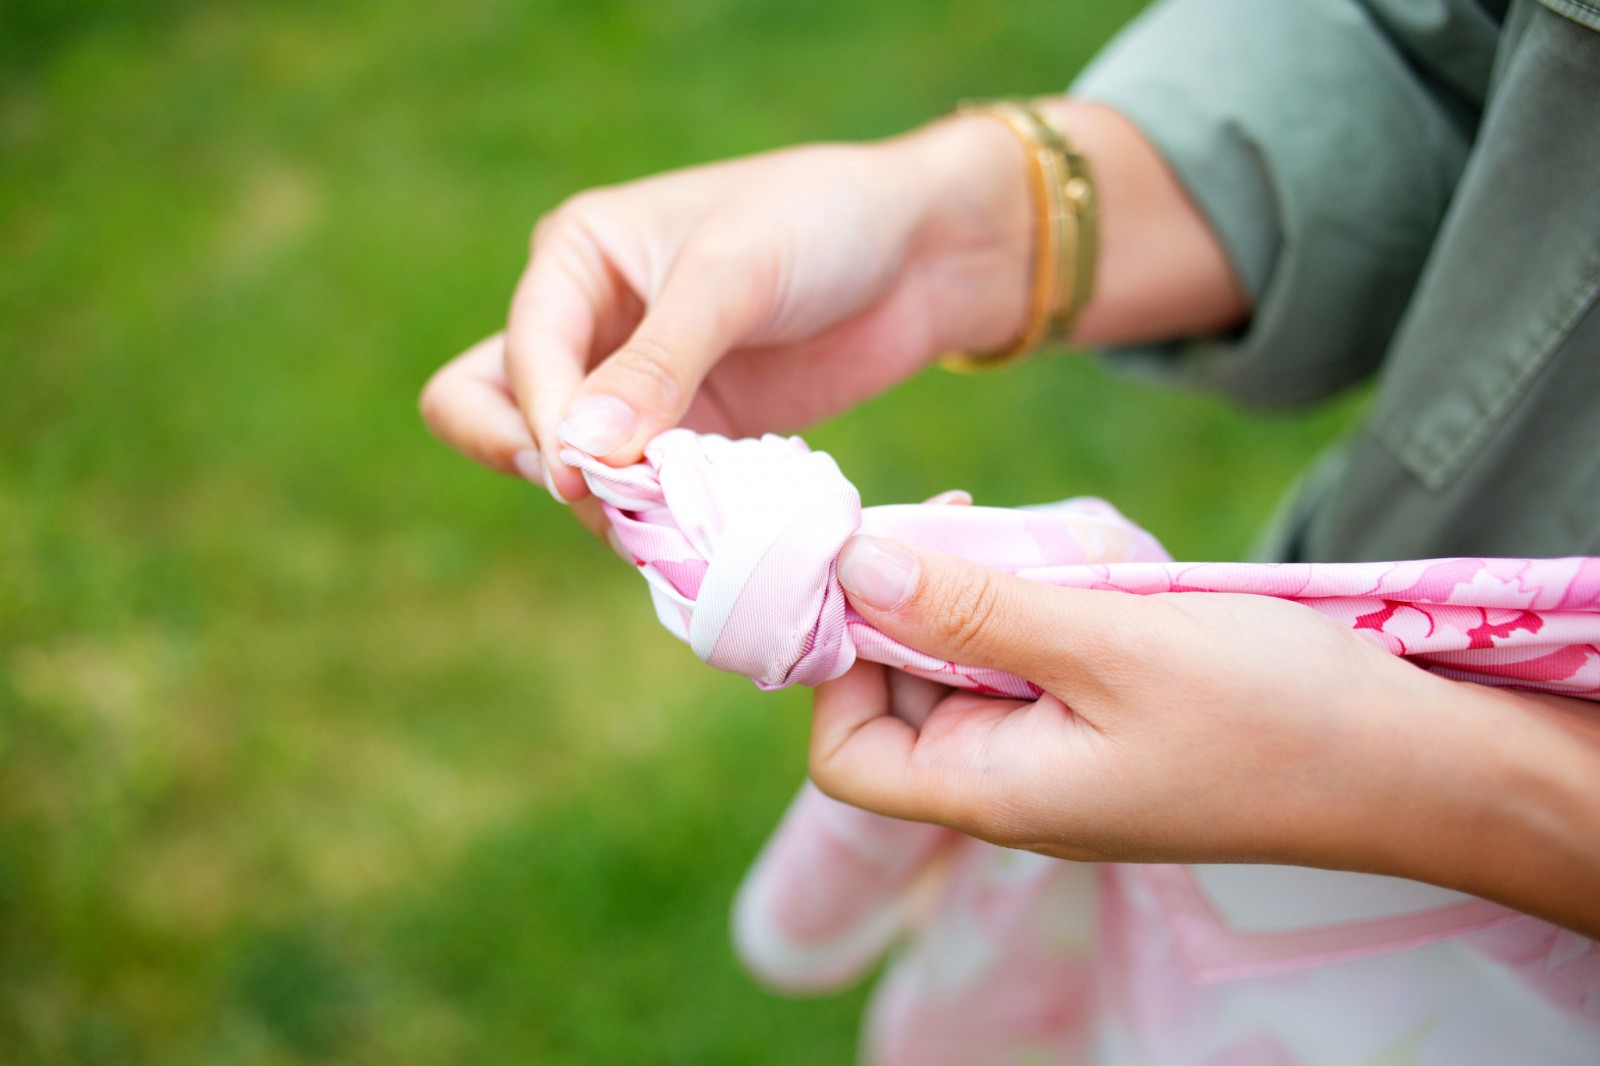


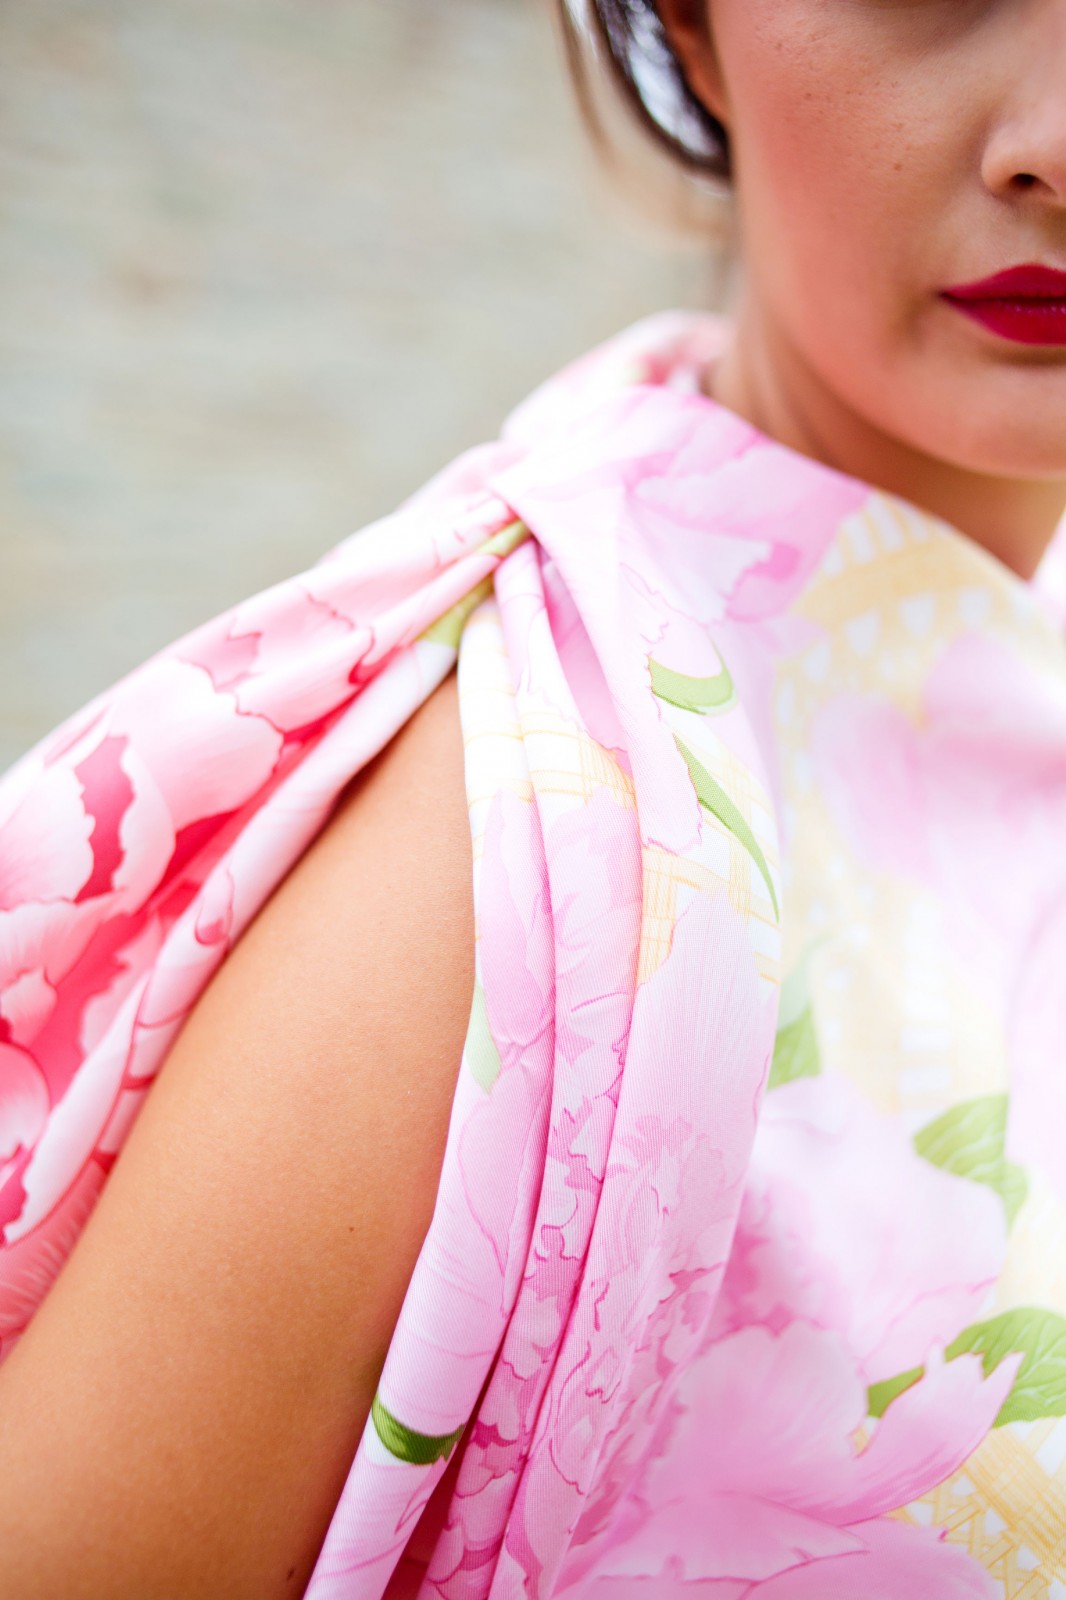
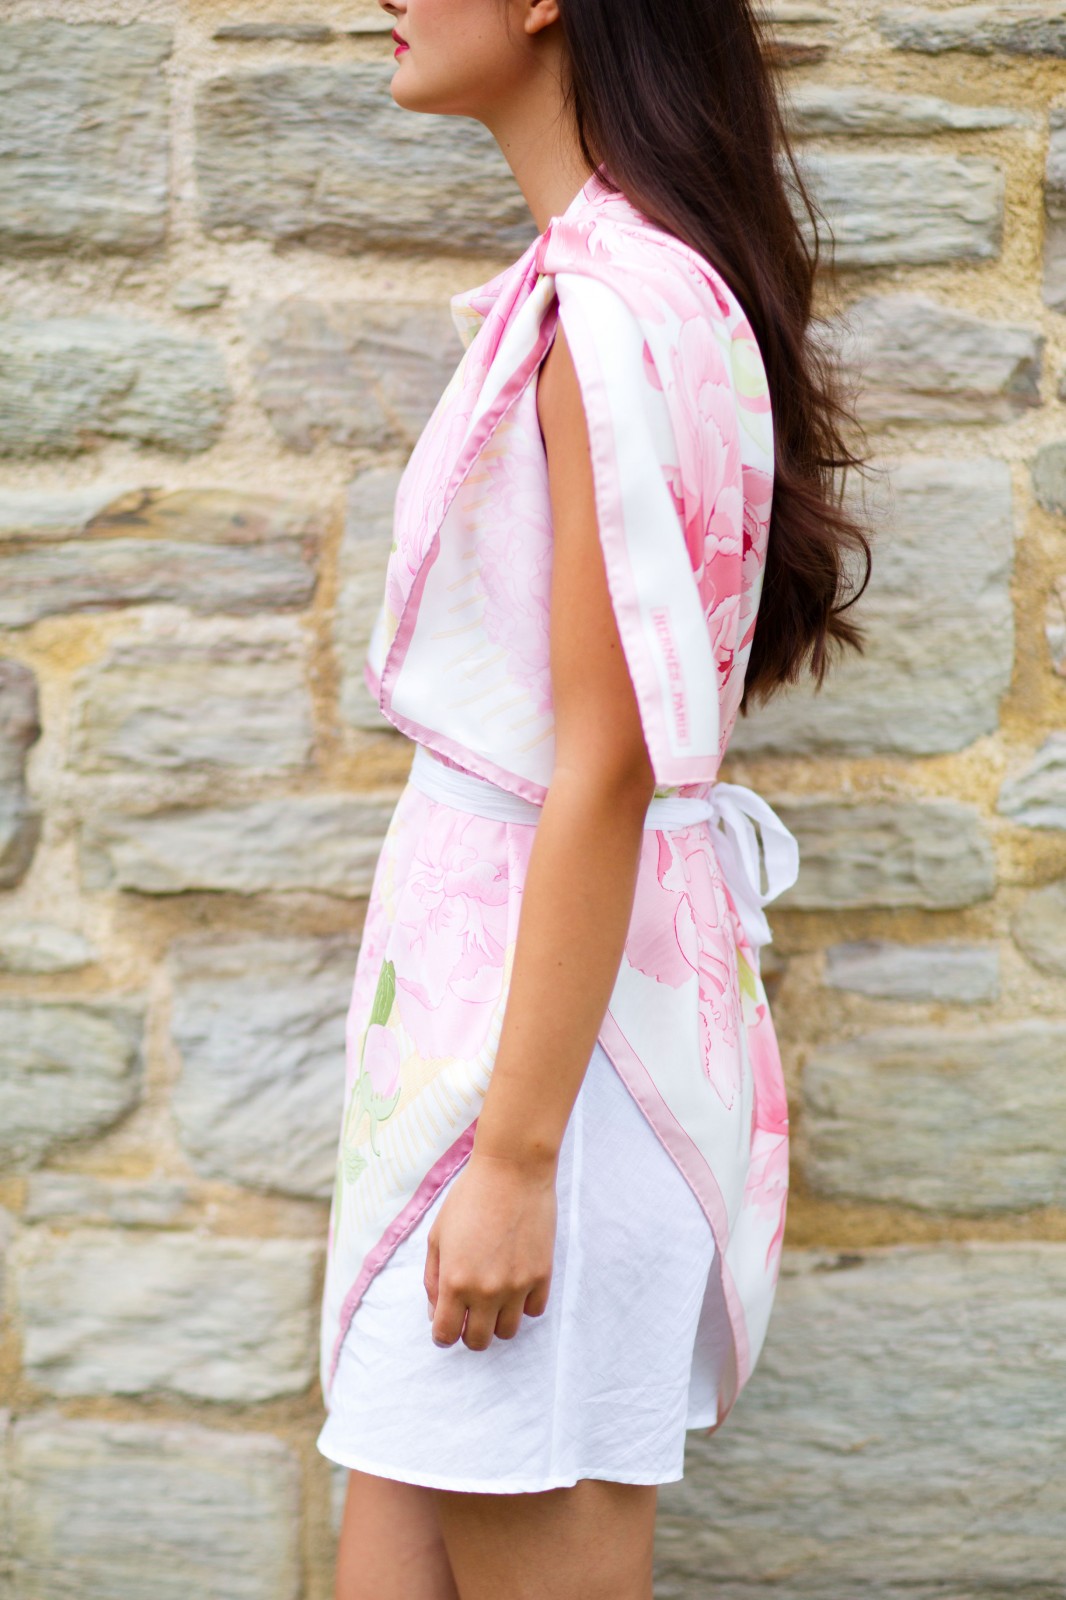
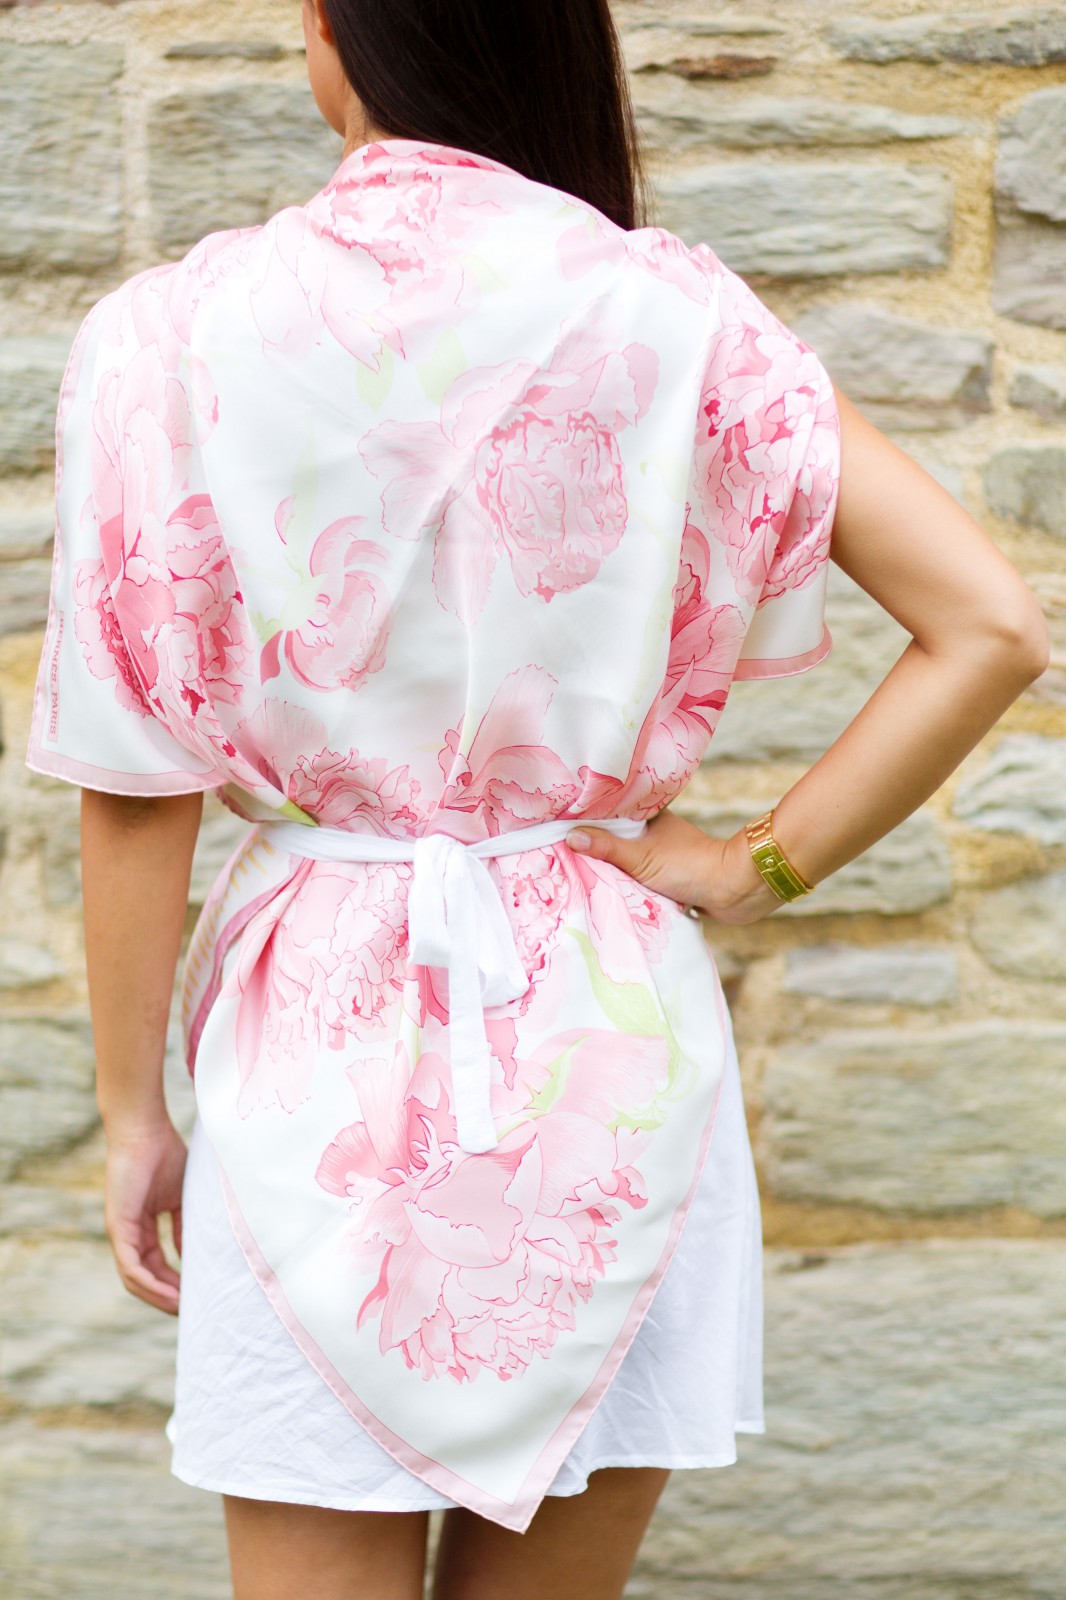
- Take scarf one and lie it print side down, fold the top corner about a quarter back towards you.
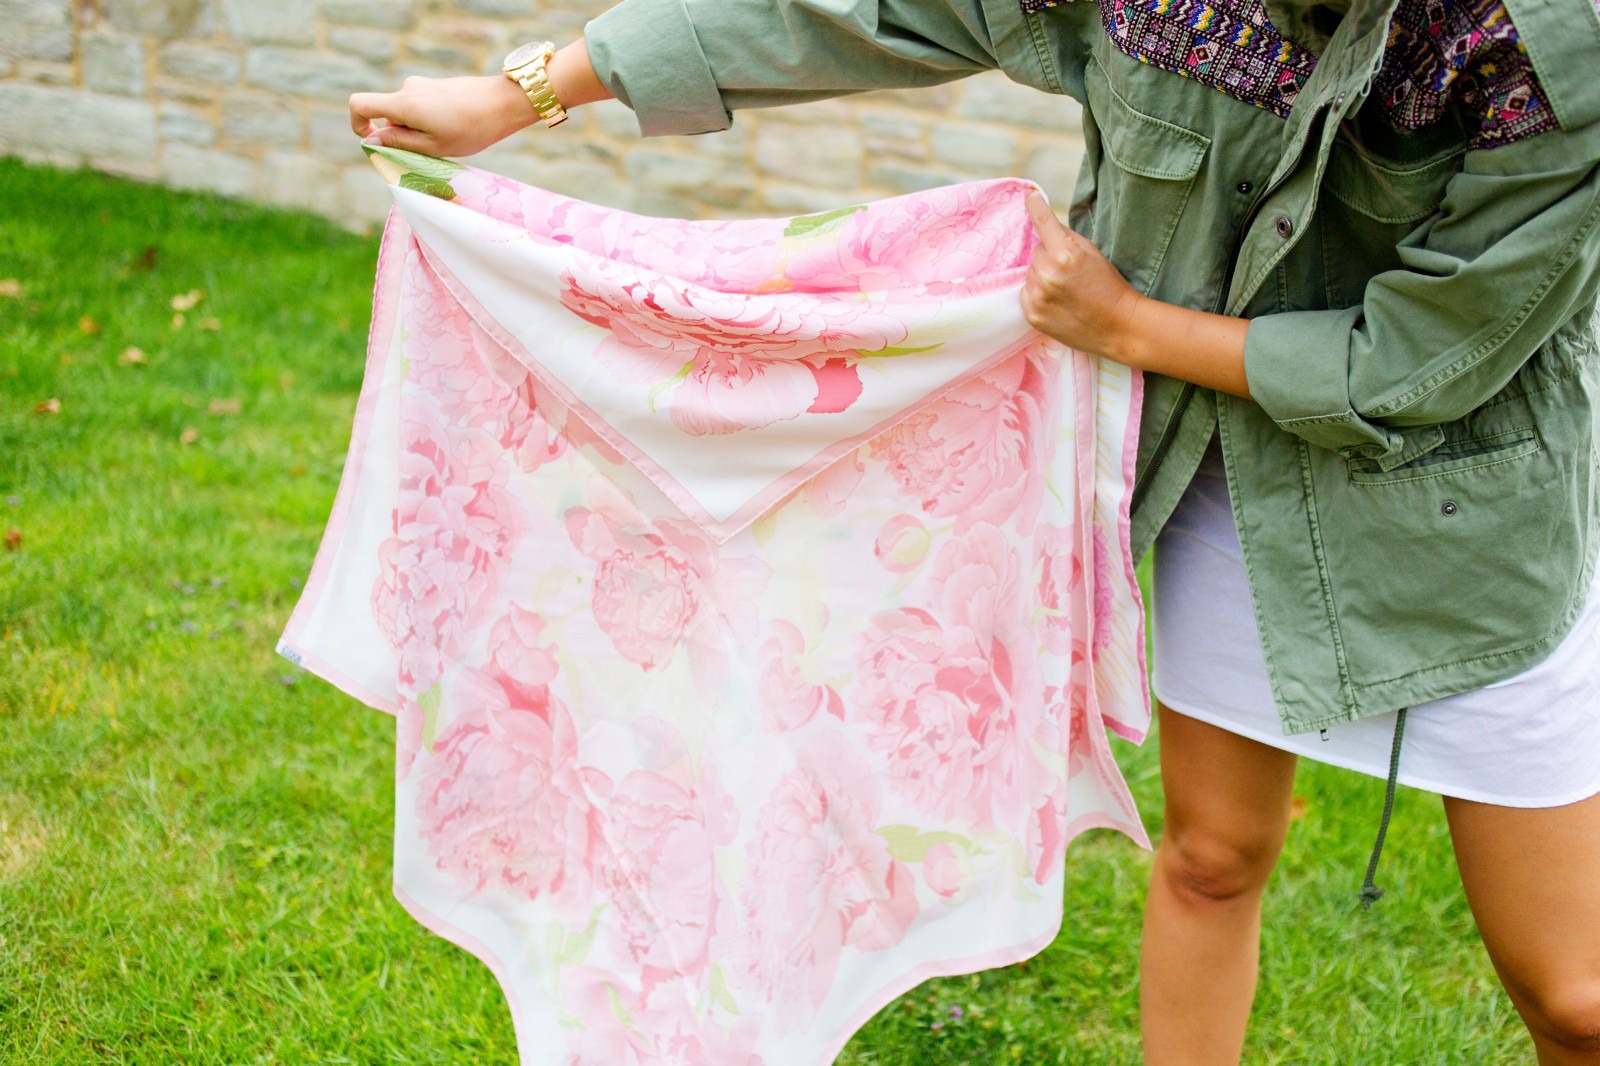
- Repeat the same process with scarf two and then hold them together, folds on the outside, print on the inside.
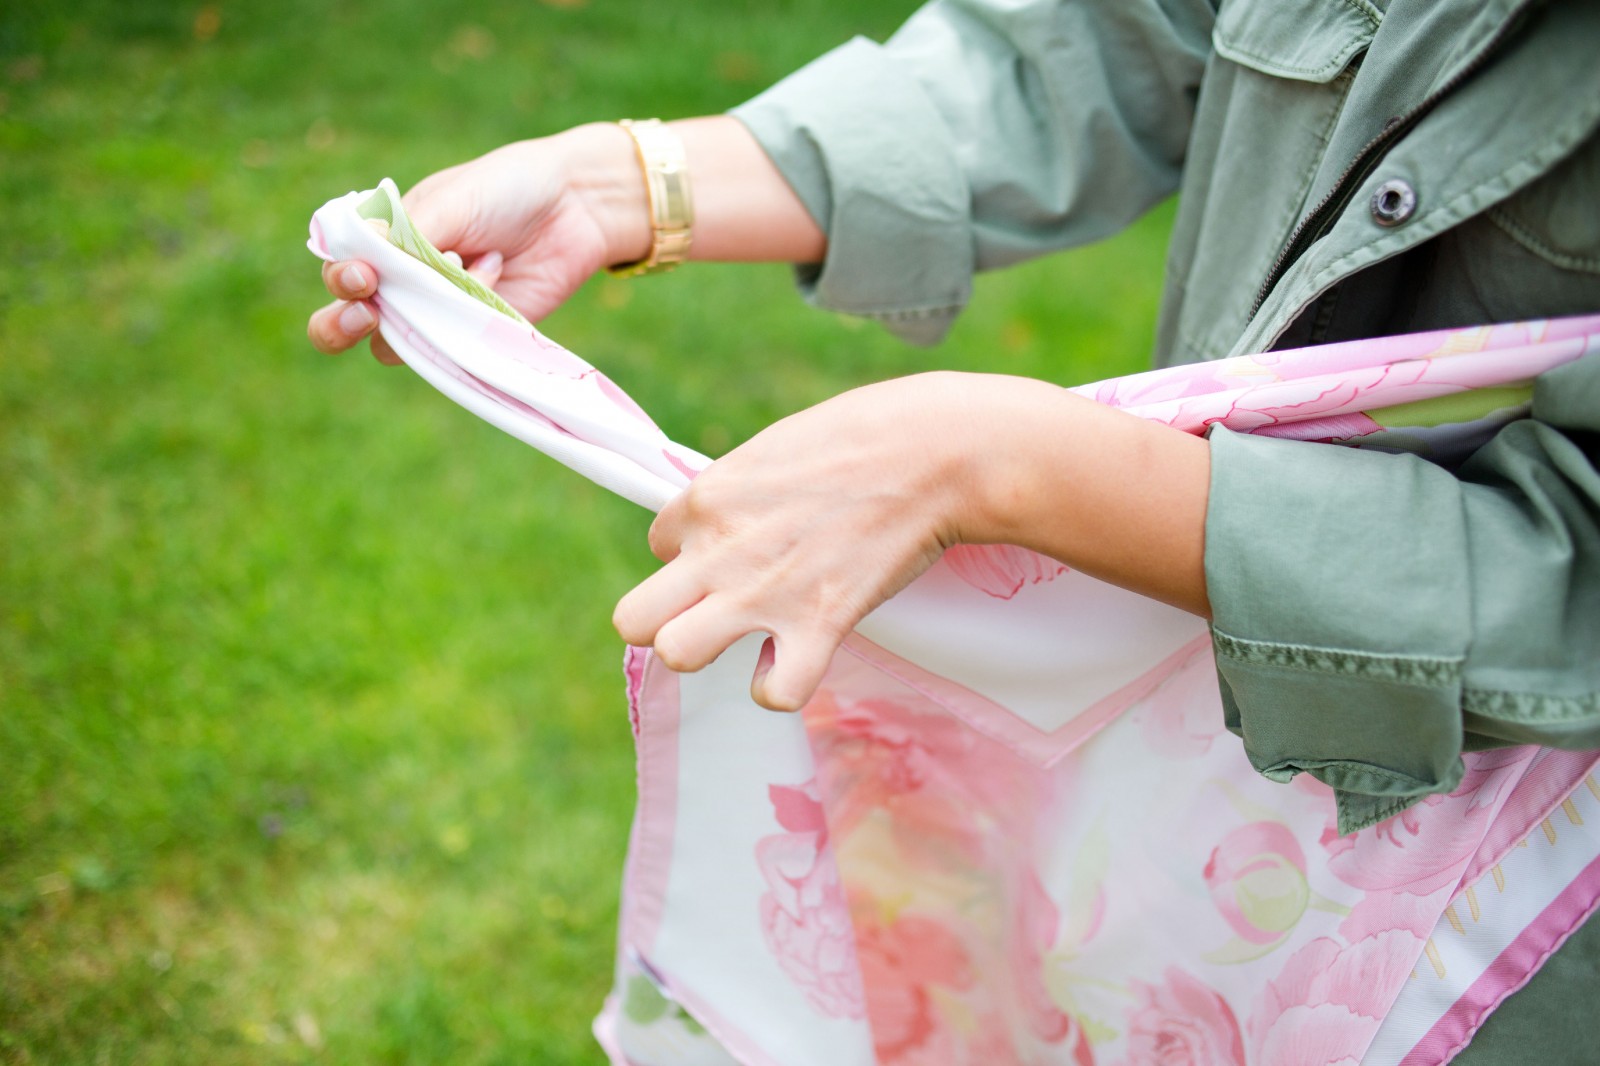
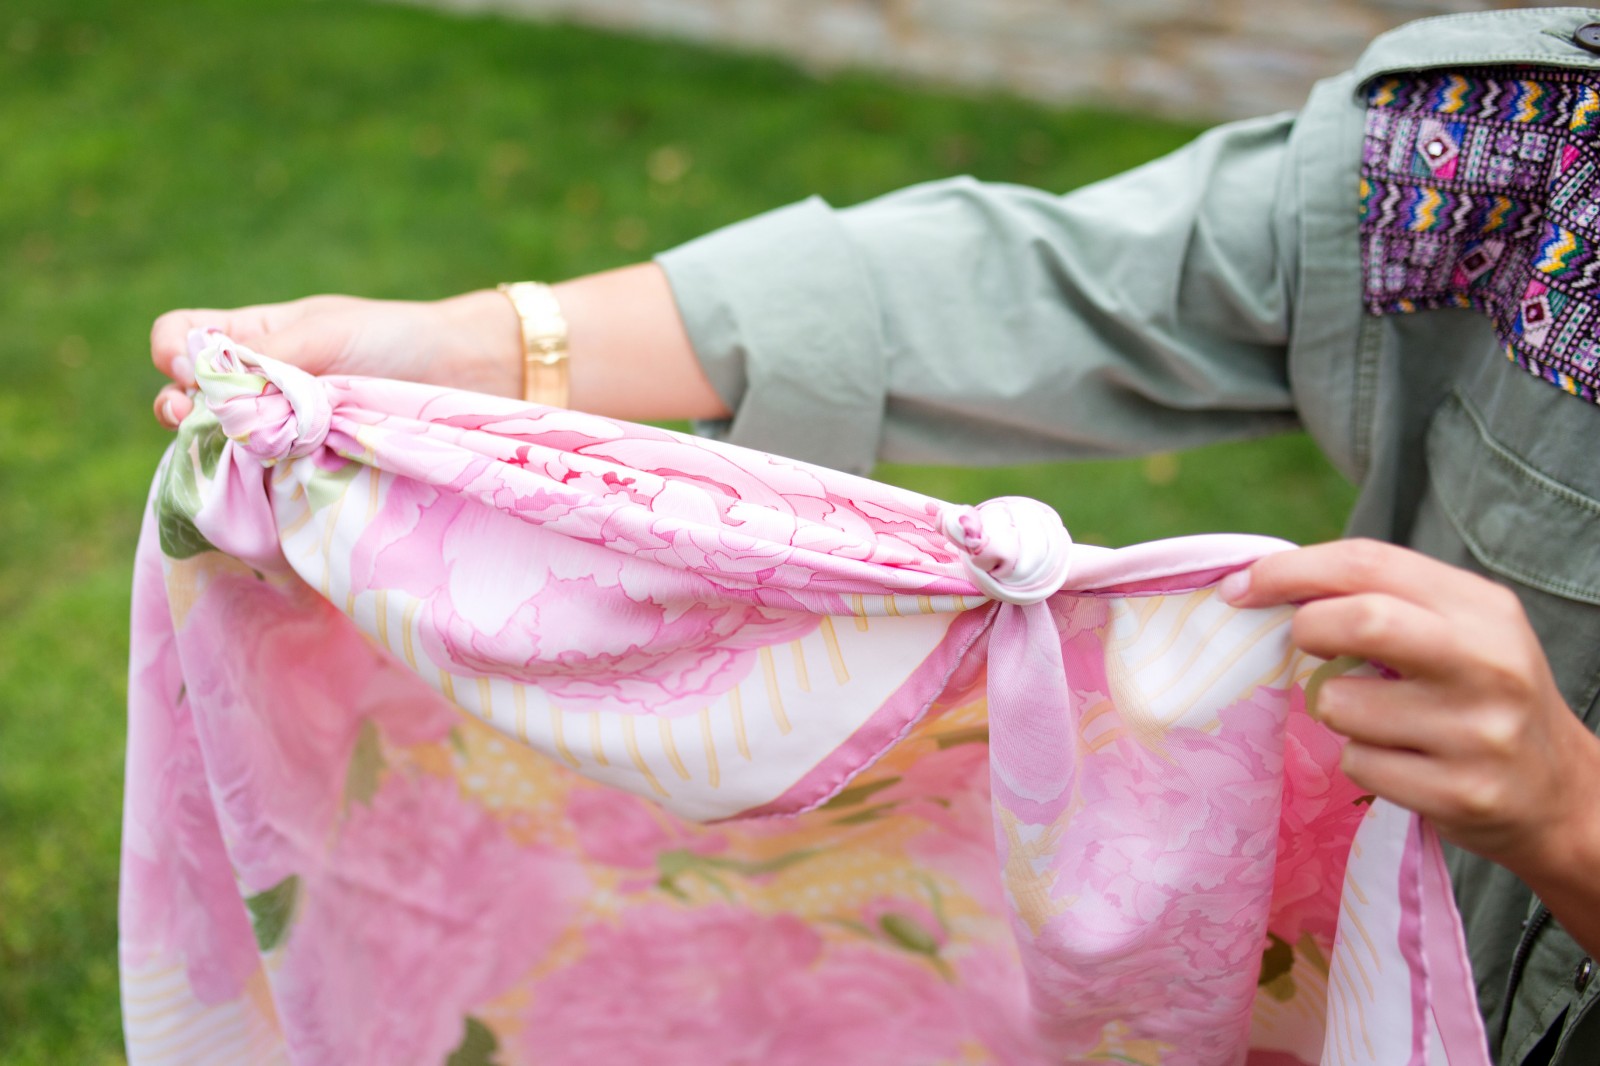
- Tie the corners of the folds together either side and pull tight, this knot needs to be strong but small as it will sit on your shoulder.
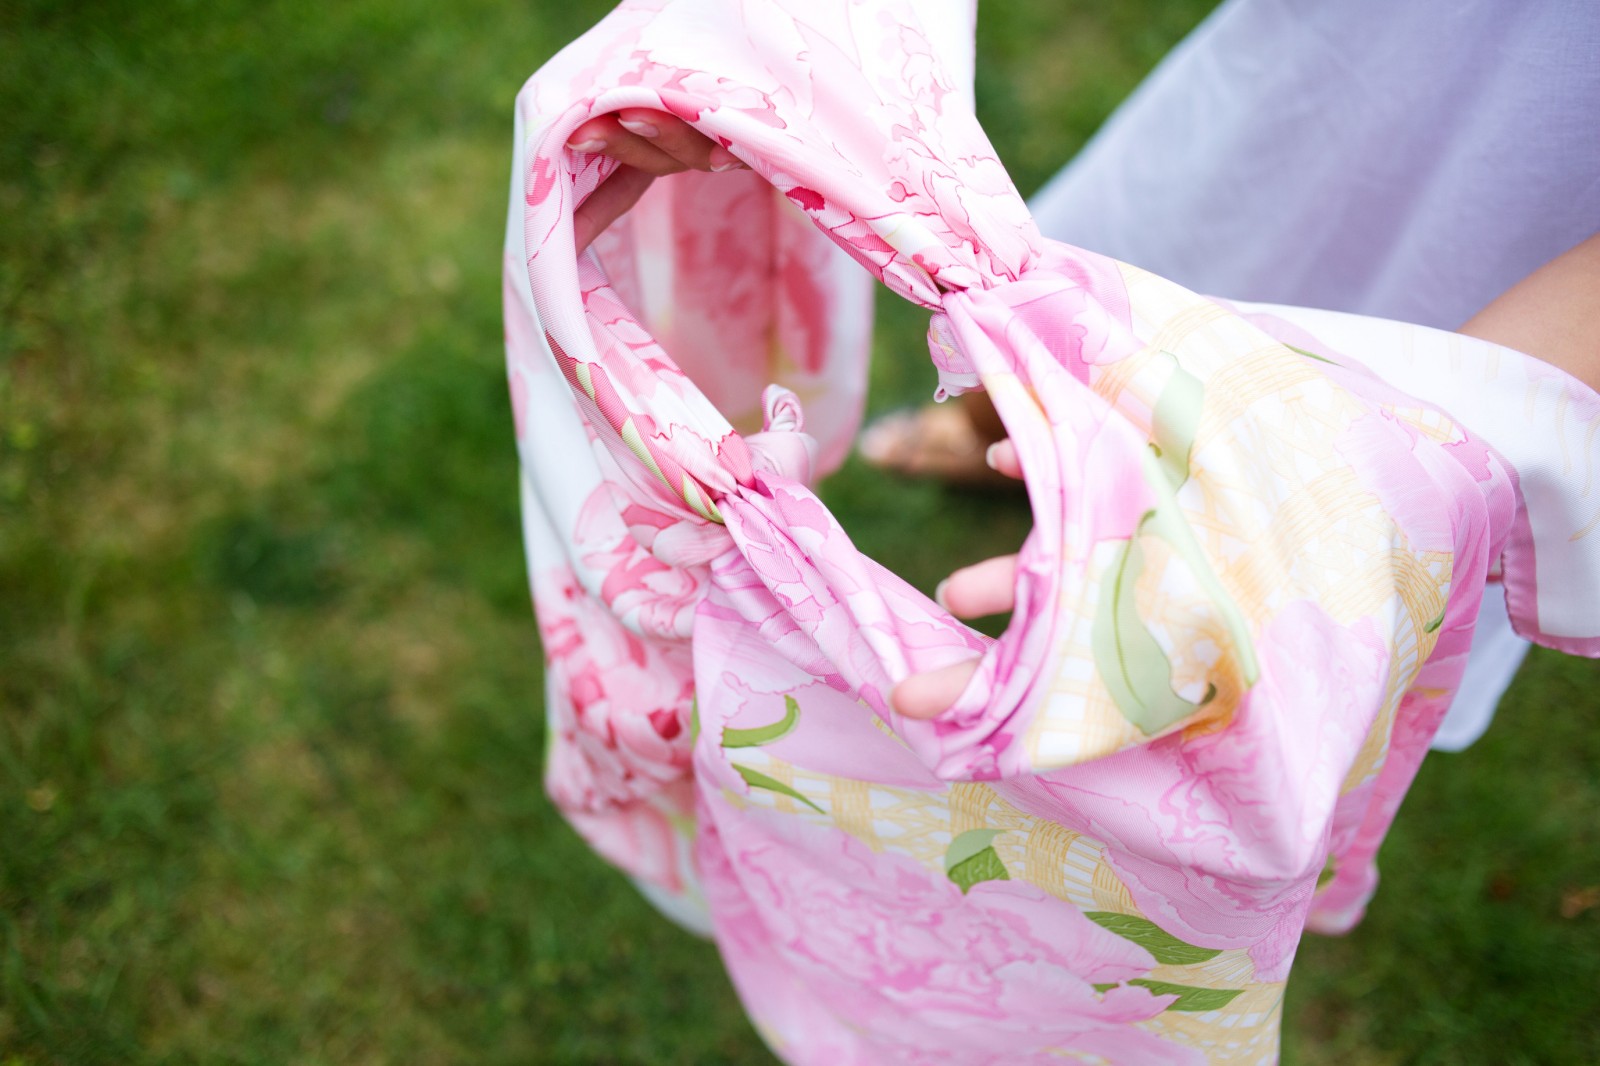
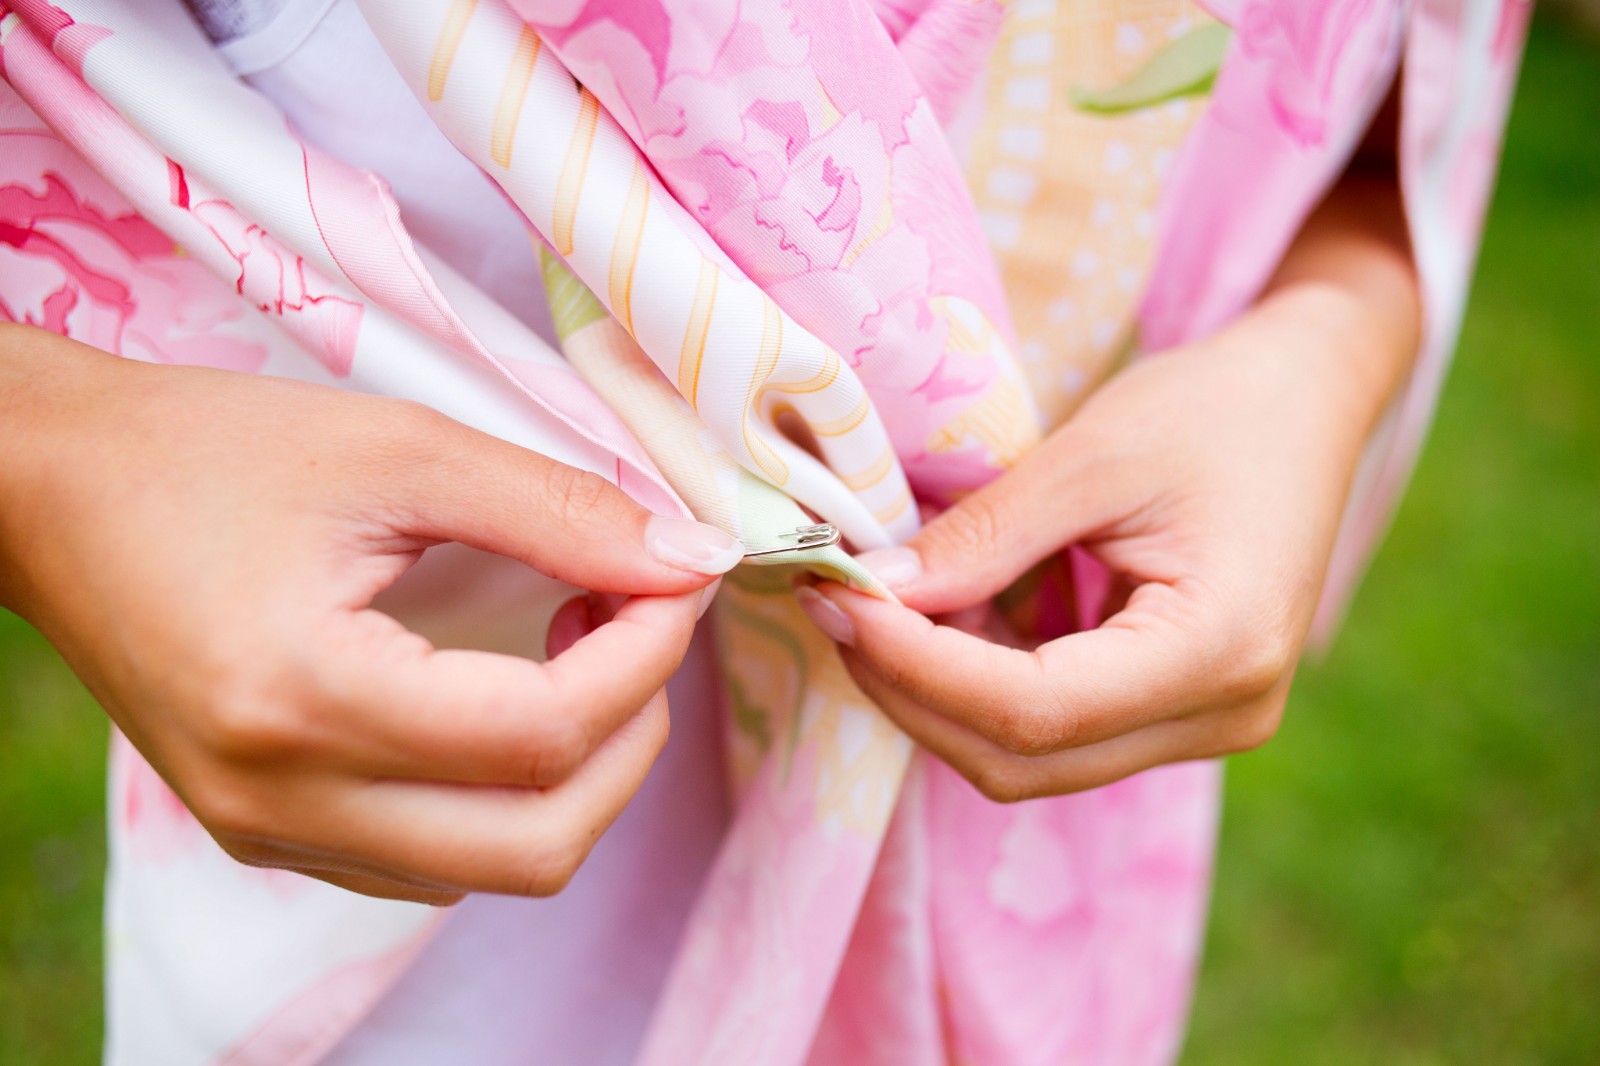
- Place your head through the loop, with your arms in the gap between the two scarves.
- Take a safety pin and pin the back scarf to the inside of the front scarf. This will hold the dress shut. I would begin with one on each side and then work out how many more you need to feel safe and covered.
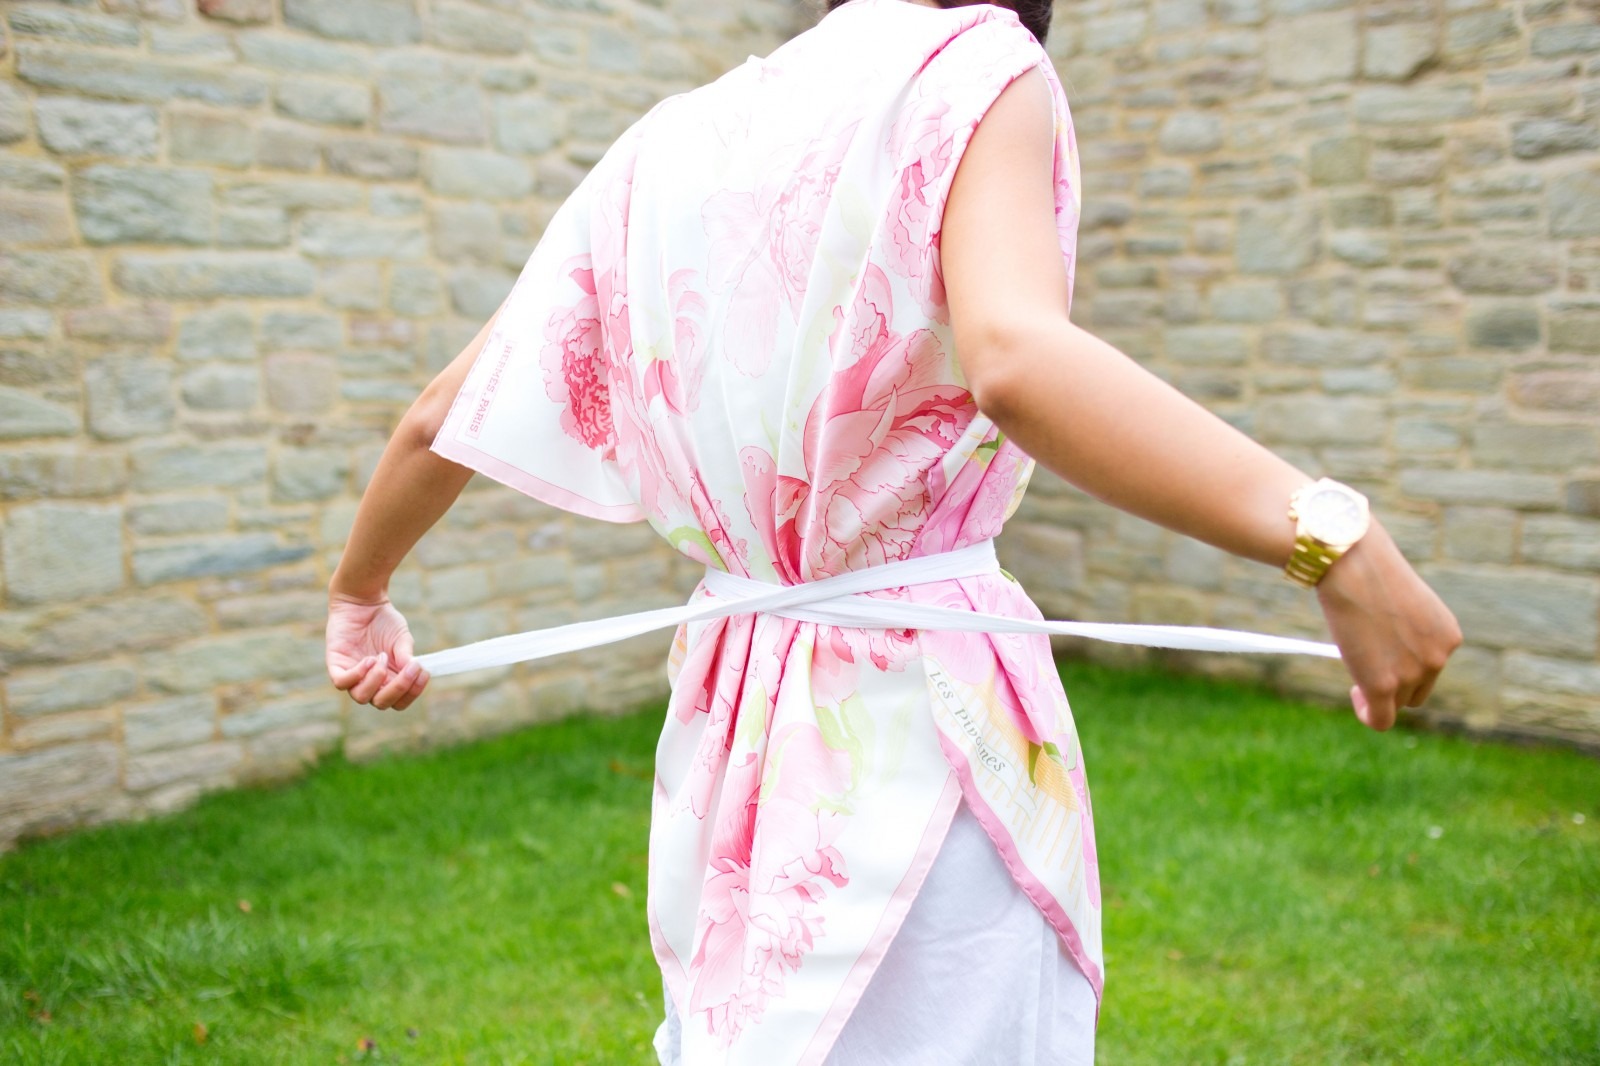
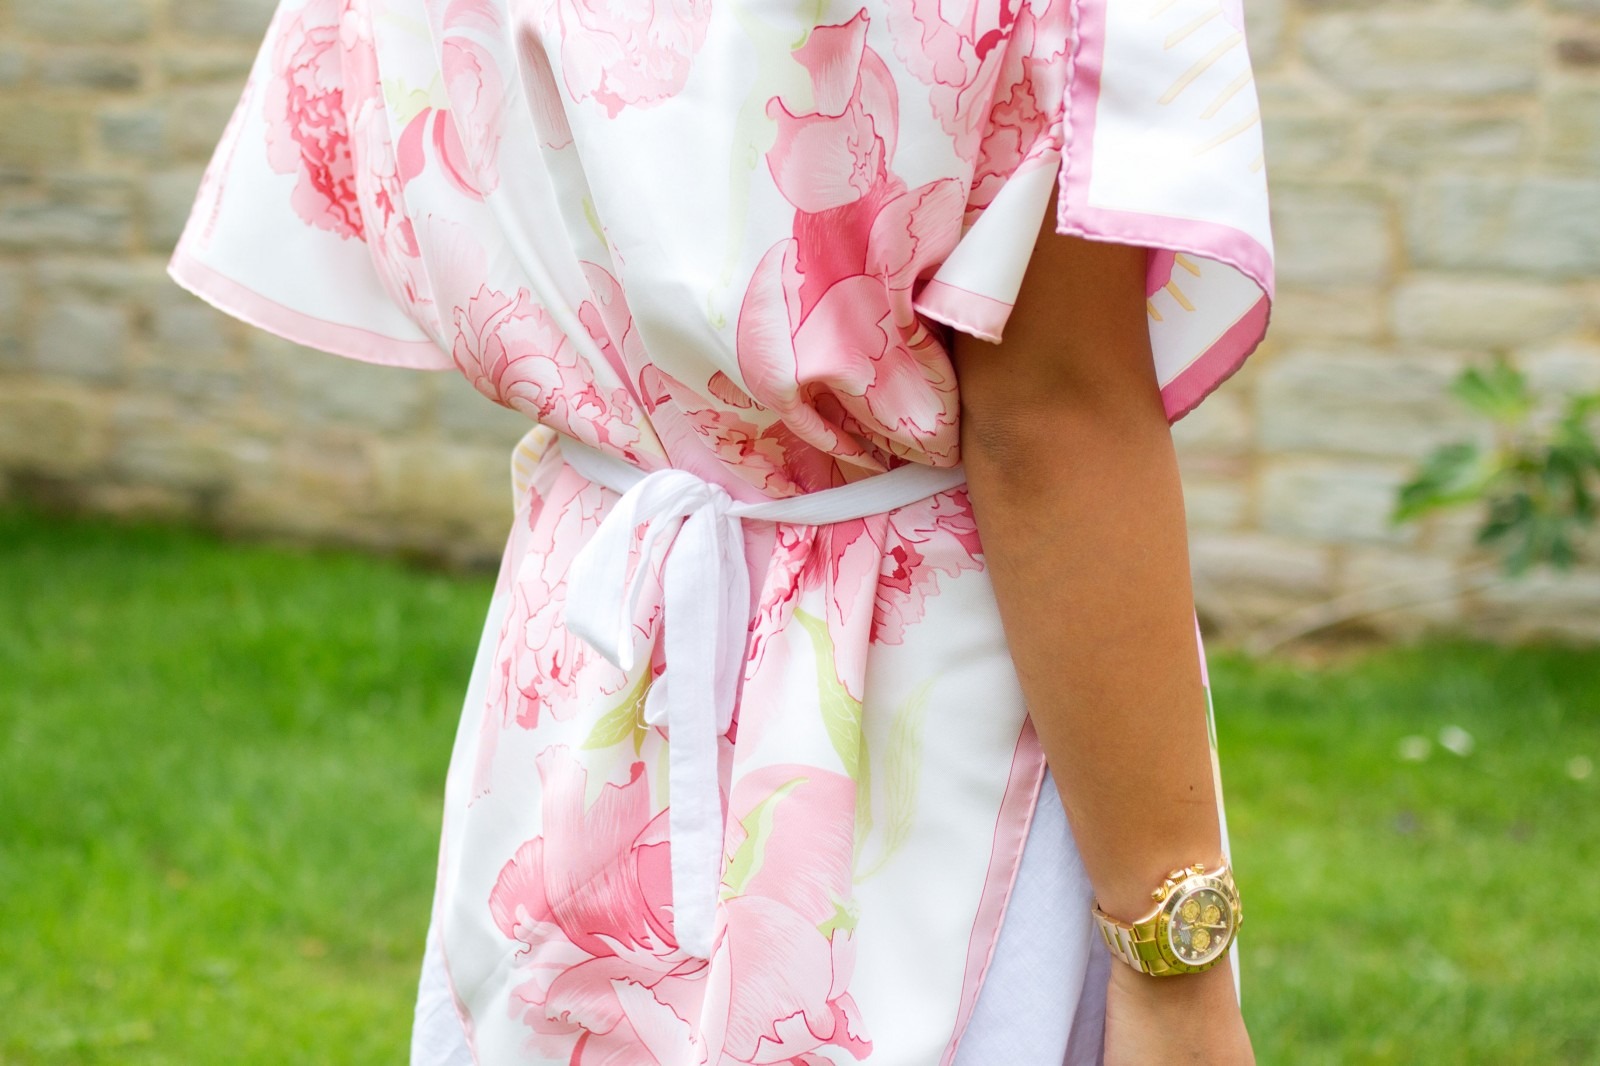
- Take the ribbon and tie it around your waist, making a bow at the back.
- With all these scarf based outfits, its so important to look in the mirror at the end and alter the way the scarves are hanging to make sure they look their best.


Top photo via Vogue.com. Bottom photos from All The Pretty Birds. All others by Kit Lee.